
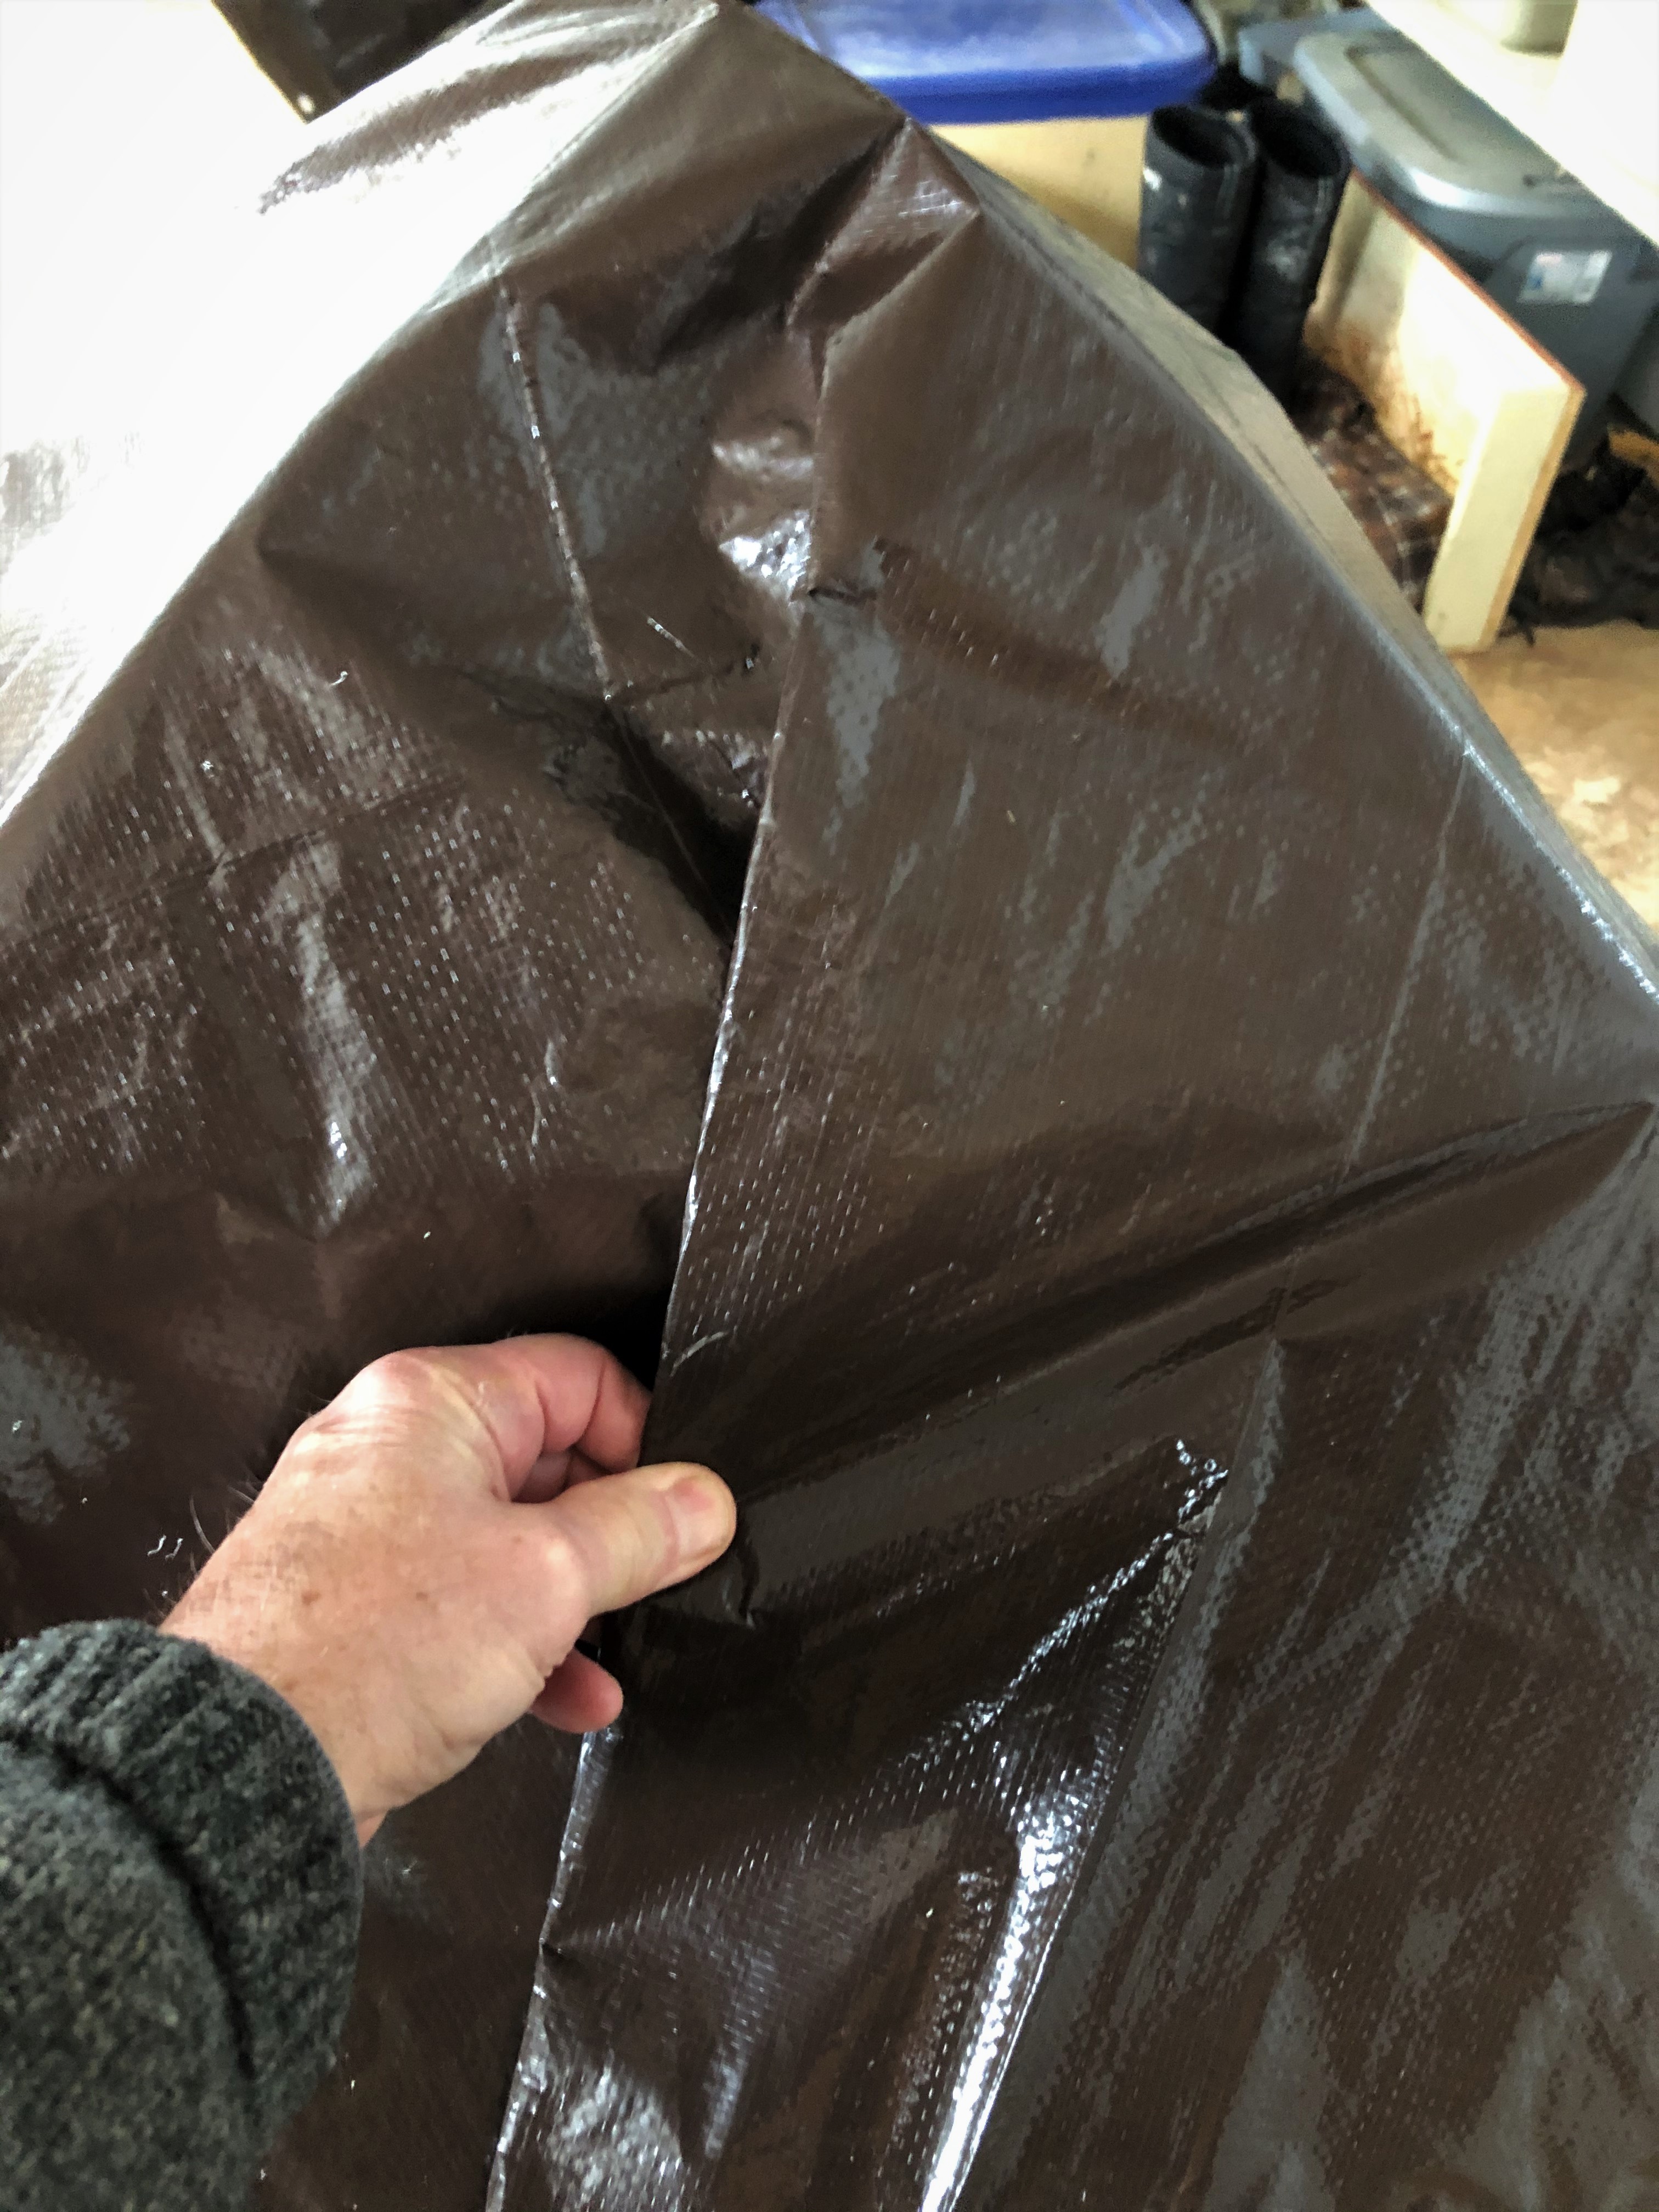
The owner’s manual warned that prolonged exposure to ultraviolet light would cause fading and deterioration of the Ameristep ground blind’s fabric covering, so I expected to get only two or three years of service from this blind. Way too optimistic.
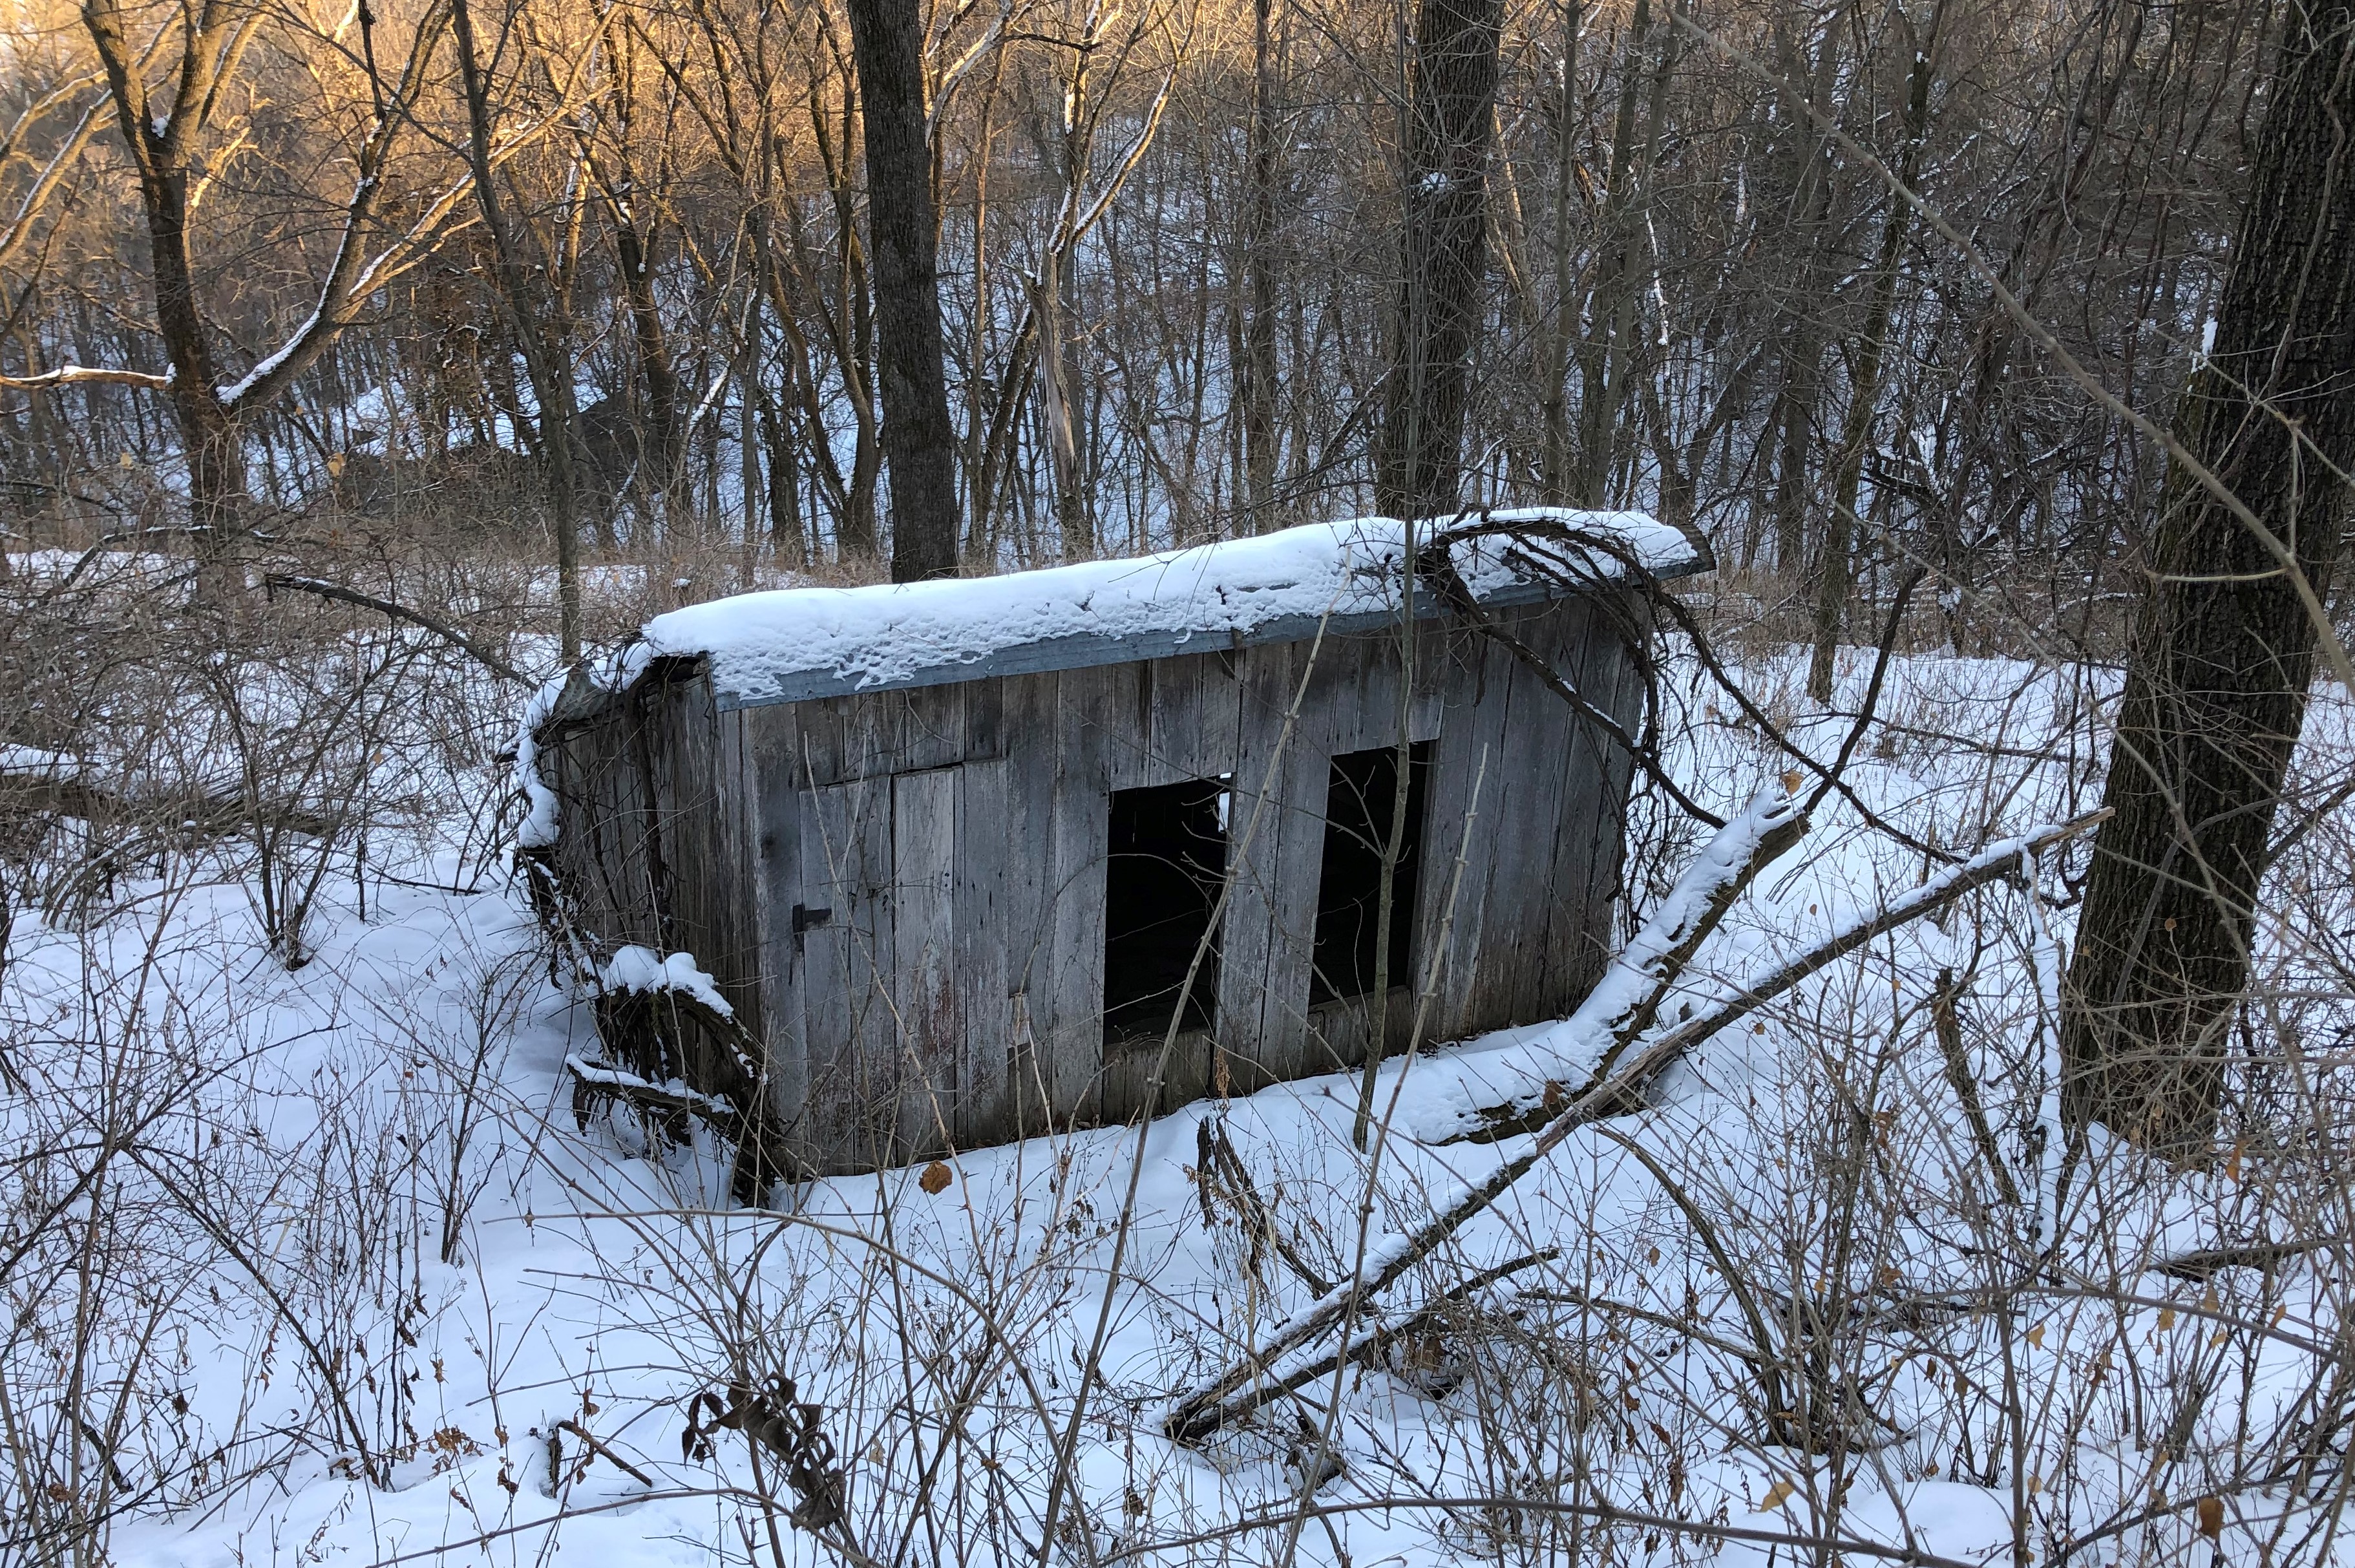
I set it up in August. In December I pressed my hand against the fabric to adjust it. My fingers ripped through. By the end of this winter, no doubt, the fabric will be hanging in shredded strips from the framework.
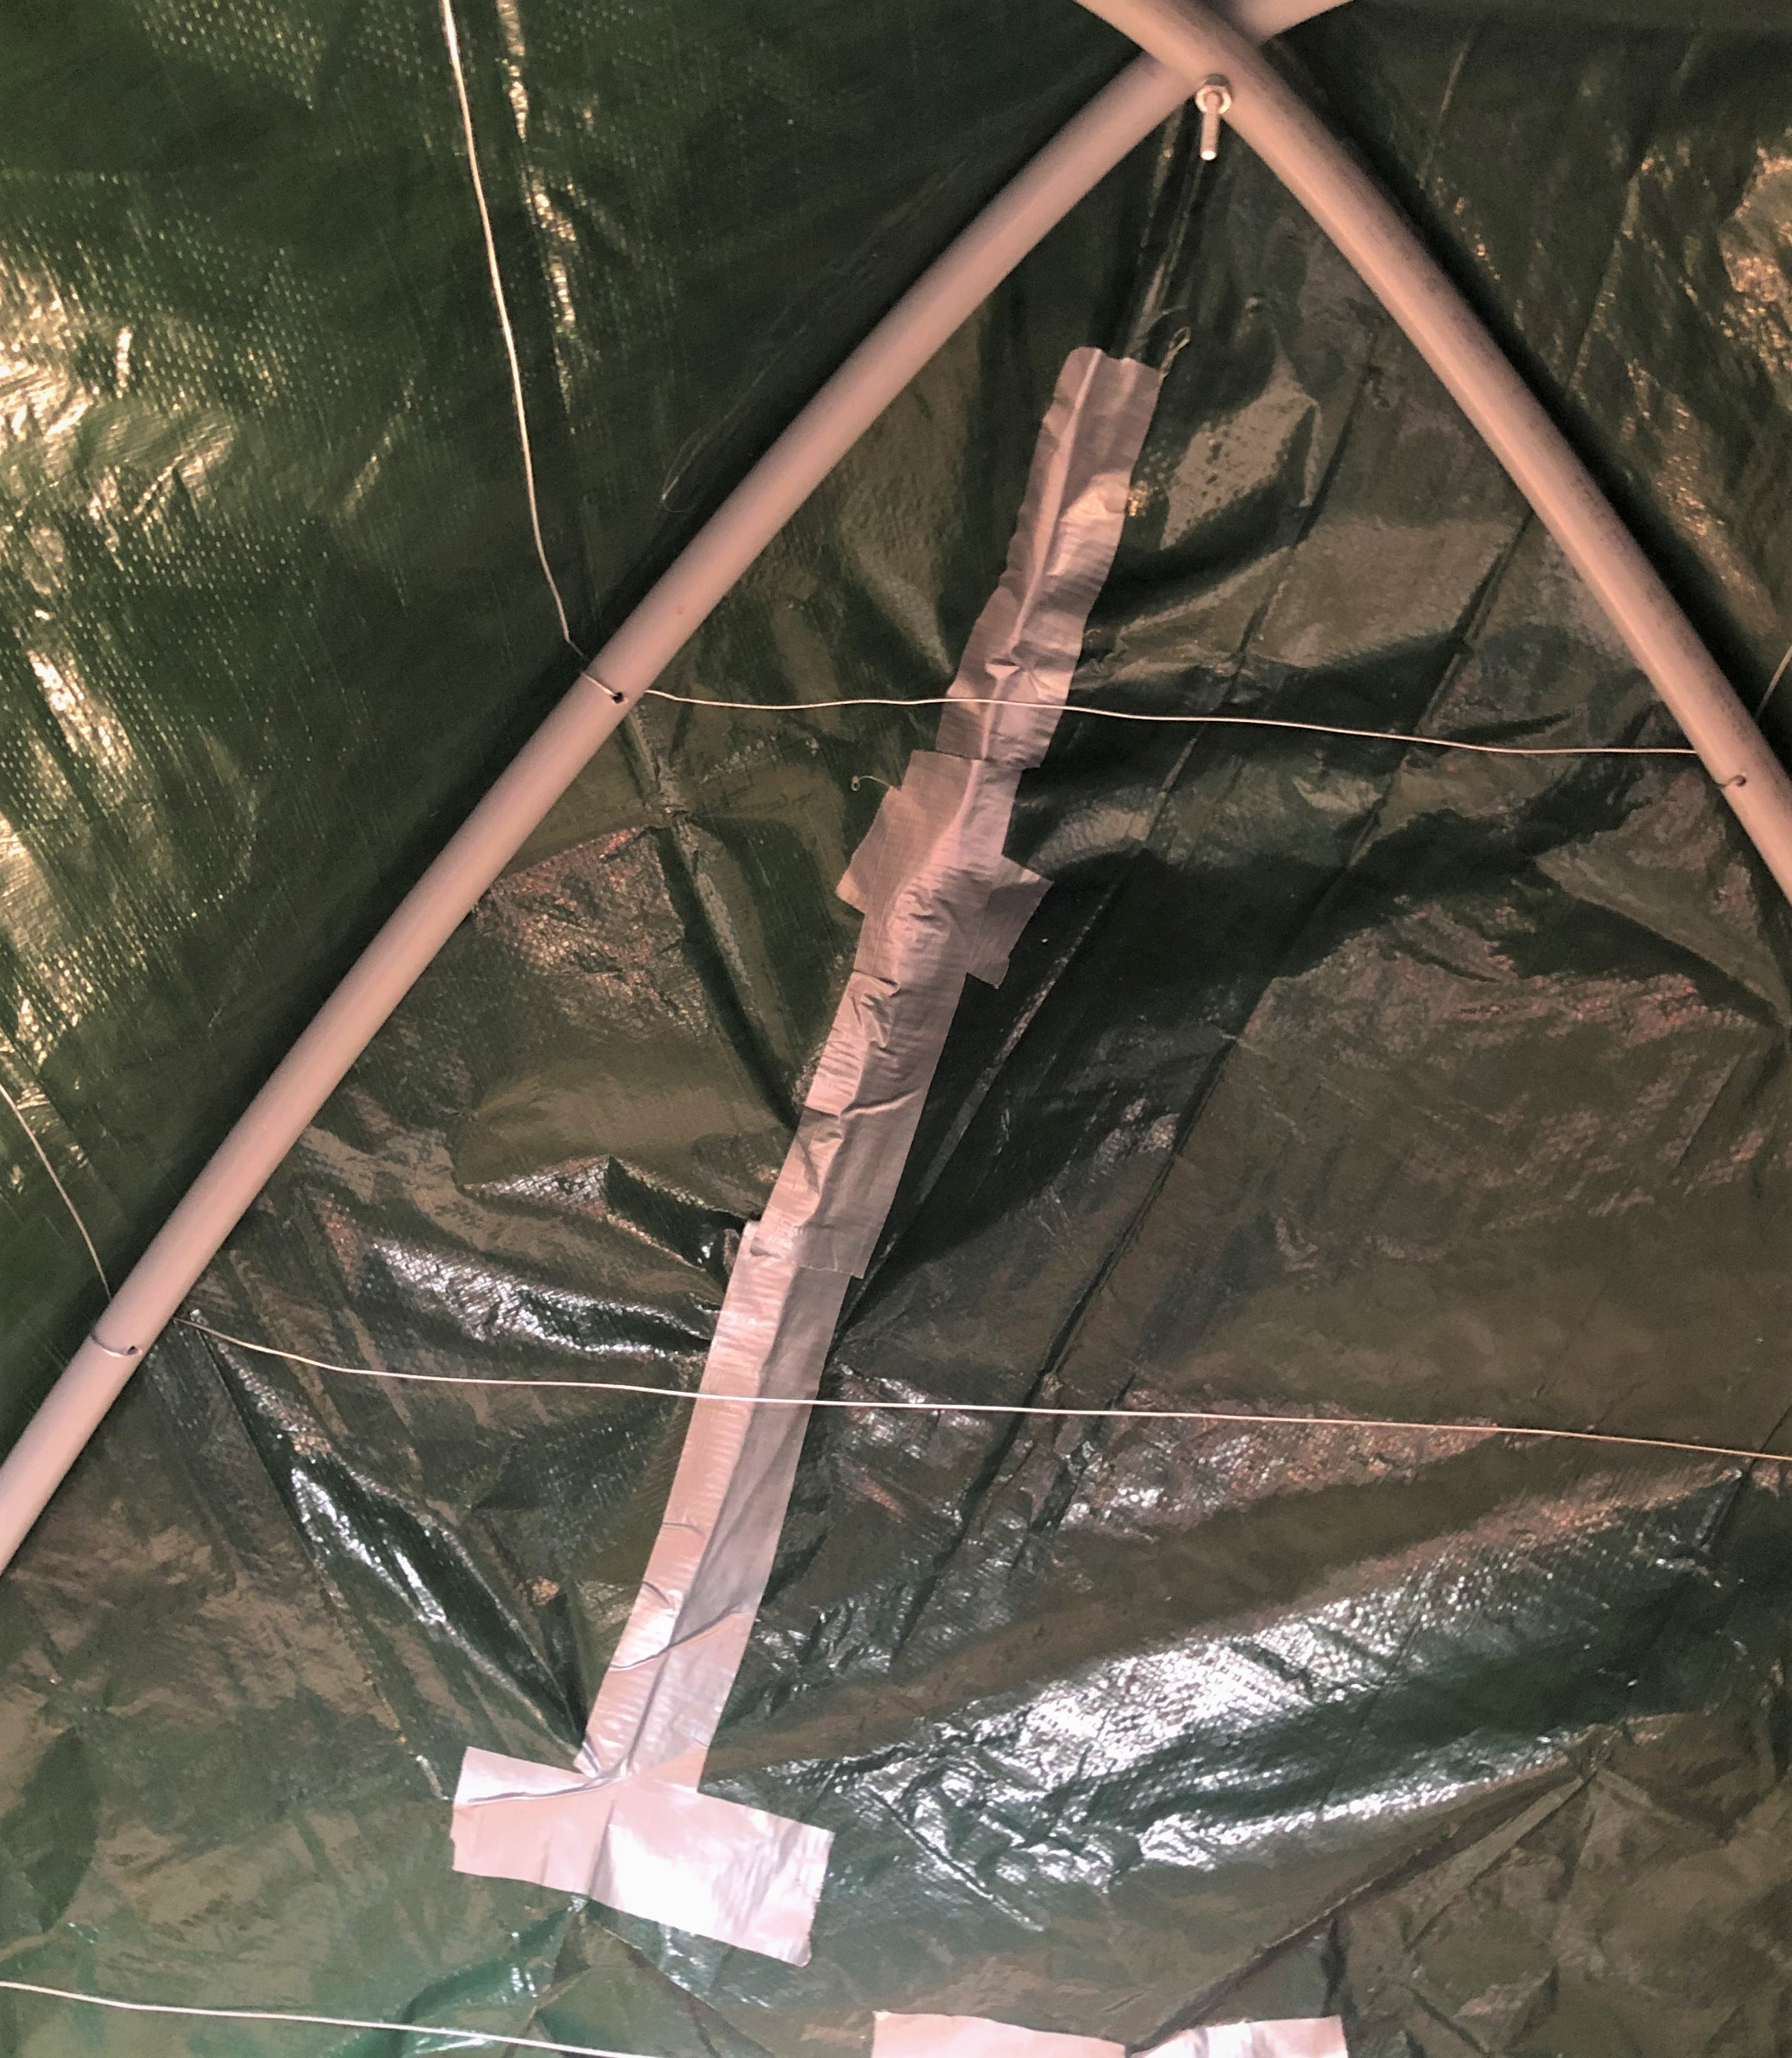
Maybe if I had set it up inside the dilapidated old hog house, out of direct sunlight, it would have lasted longer, not exposed to the sun’s ultraviolet rays, but deer very seldom come into the hog house. In the partial shade of our red cedar shelterbelt this flimsy material rotted in less than five months. Exacerbating my dissatisfaction with this Ameristep blind, a support rib shattered when I set it up, and I had to splint it with a dowel rod, wire, and duct tape.
Clearly not worth the $129.99 I paid for it, even with free shipping. Lesson learned: build my own blind with a PVC framework and tarp coverings. That is what I set out to do. And I realized this was an opportunity to try something new.
For all the blogs I have written about outdoor sports projects (dog training, shotgun and rifle maintenance and repair, quail call-back pens, camo clothing dyes, livestock fencing, wooden box construction, dog door installation, shotshell and rifle cartridge reloading, firearm cleaning, shotgun patterning, rifle sighting…) I have never attempted a step-by-step “how-to” blog post with photos to illustrate the steps. This will be a first for me, and maybe a total disaster. But here goes.
How to Build a Ground Blind for Deer Hunting
Step 1 – Draw plans for the ground blind
To convince readers of this blog that I know what I’m doing, I put pen to paper and drew a more-or-less detailed plan of the ground blind frame that I intended to build. The drawings were not to scale and lacked specifics, but it has been my experience that unexpected glitches will beset every plan as the work goes forward, so it is best not to be overly concerned with details.
This is the self-evident starting point, but I seldom draw a project plan on paper, reasoning that my mental image of the finished product will serve as a blue print and schematic. This is often a mistake which can double the cost of the project and the time it takes to complete it.
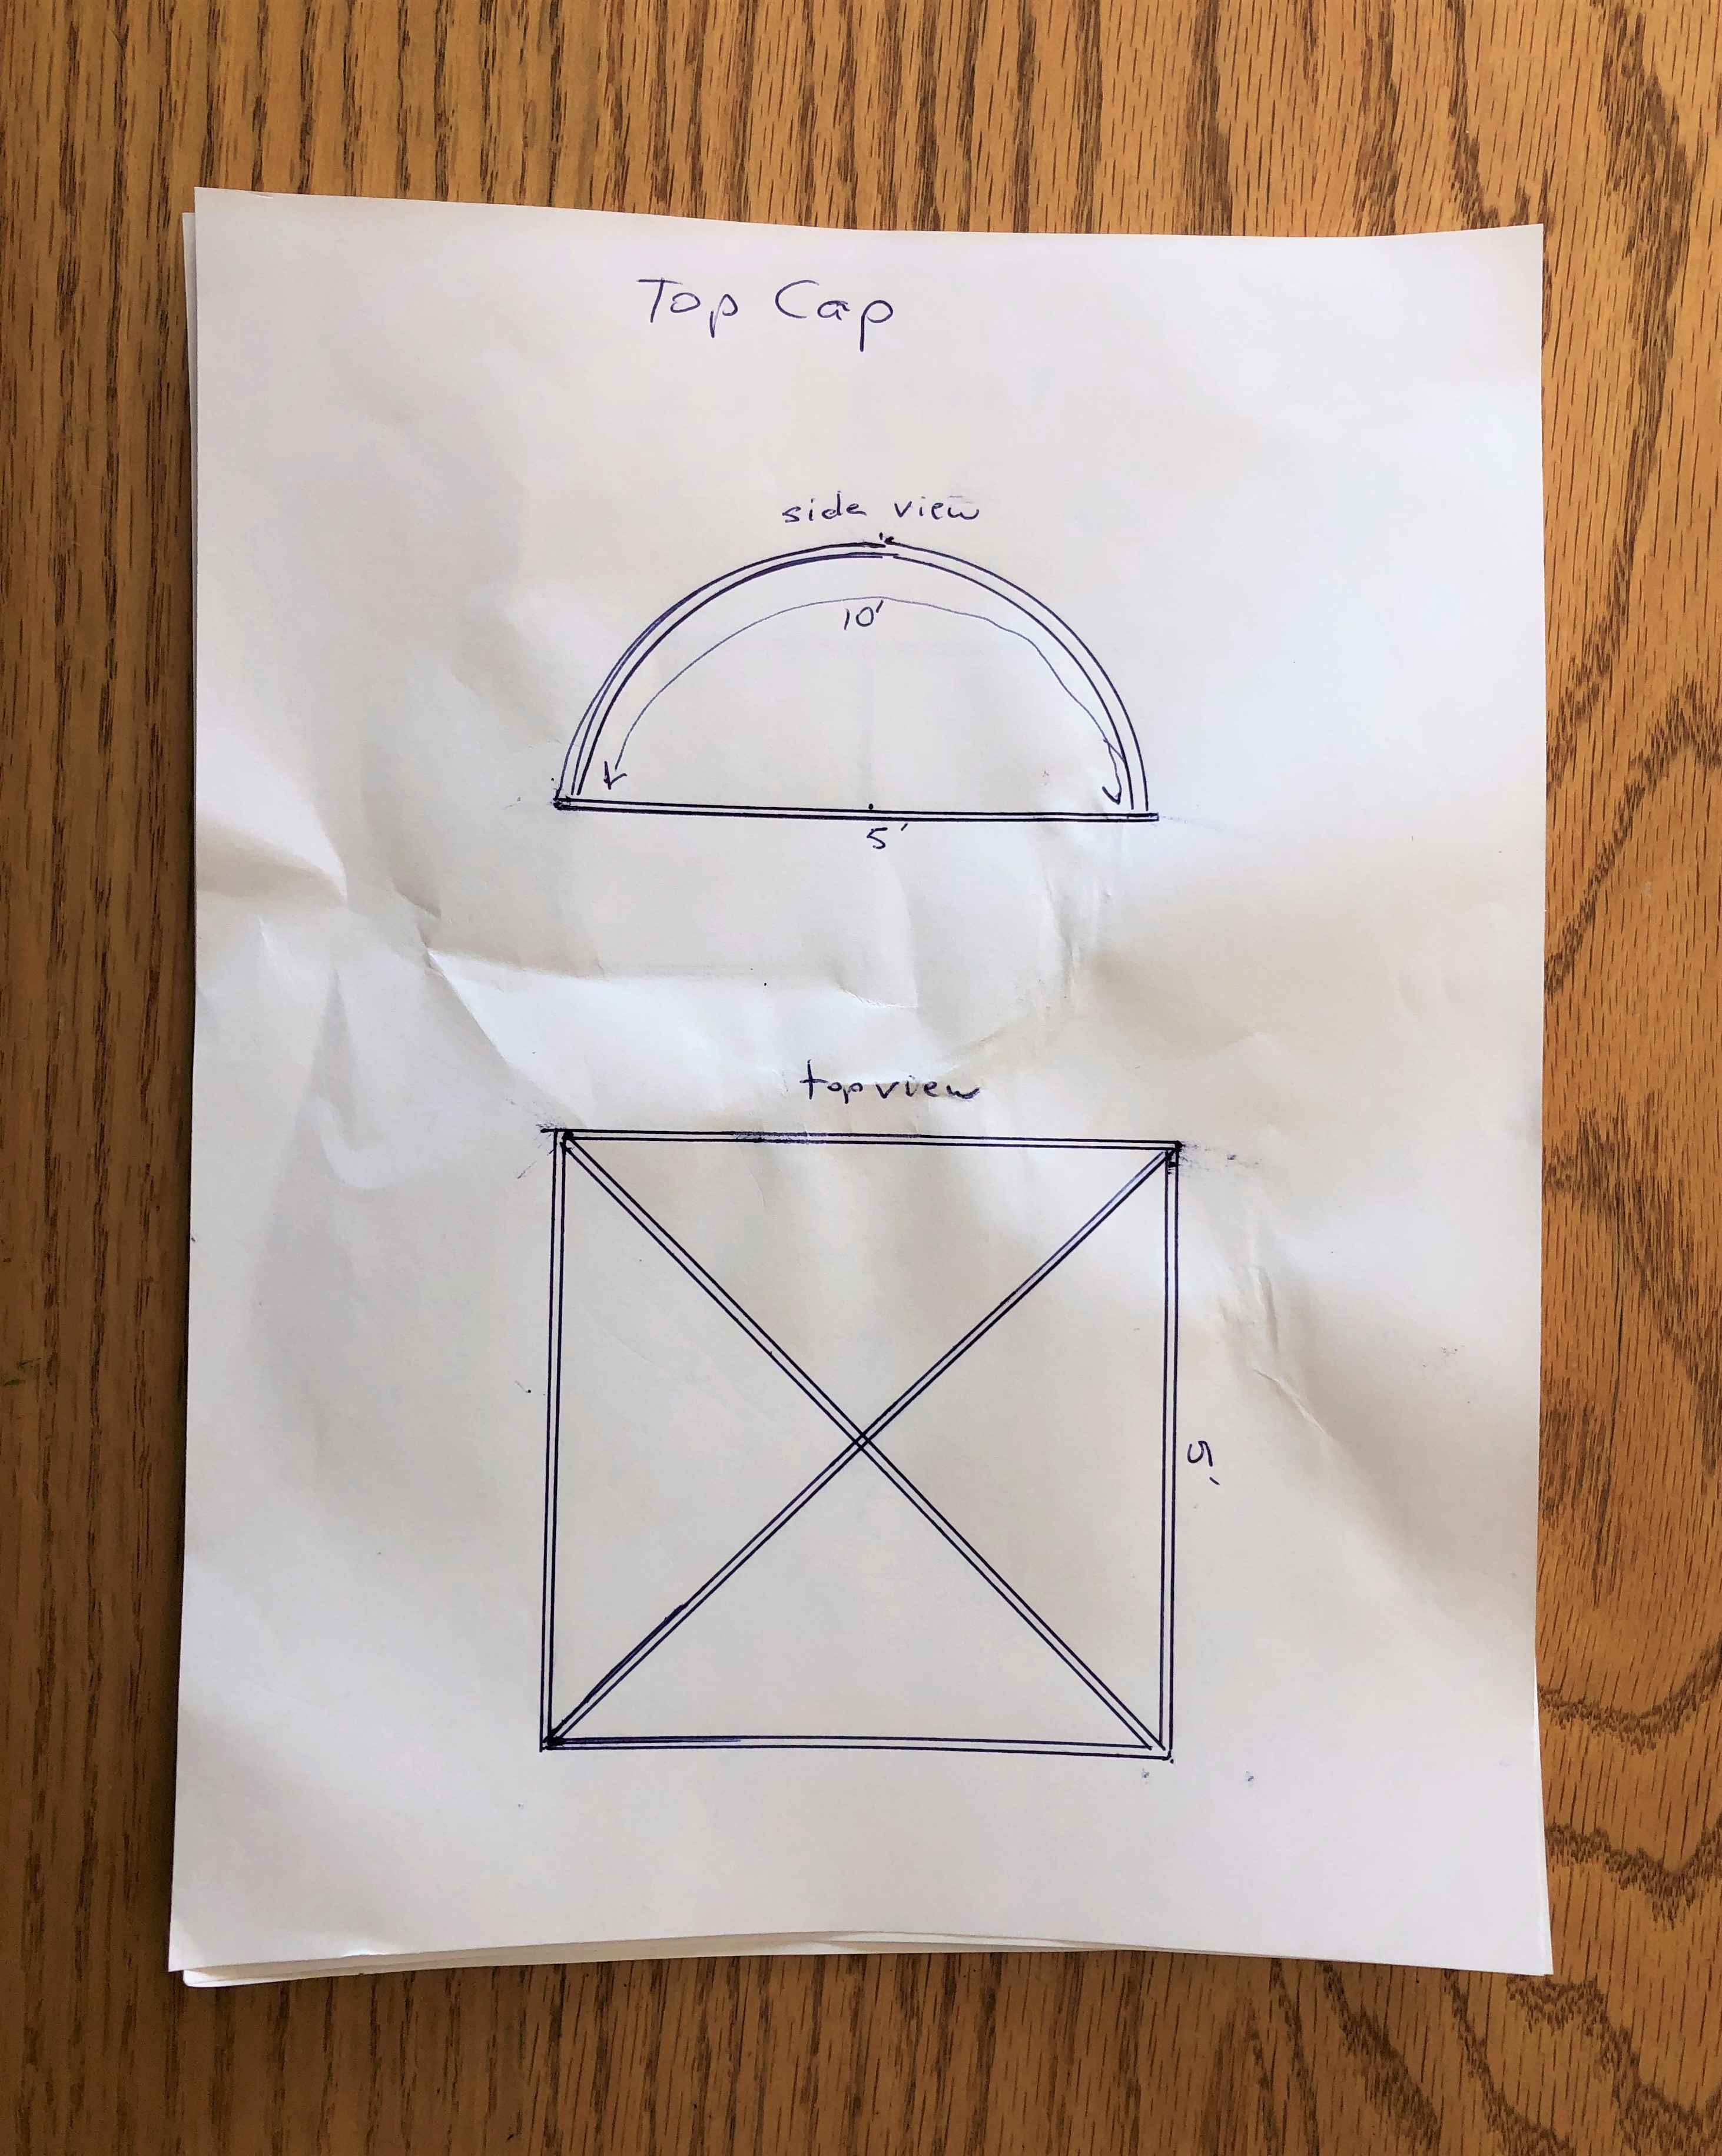
This is how the drawings of the ground blind’s cap panel appear:
.
.
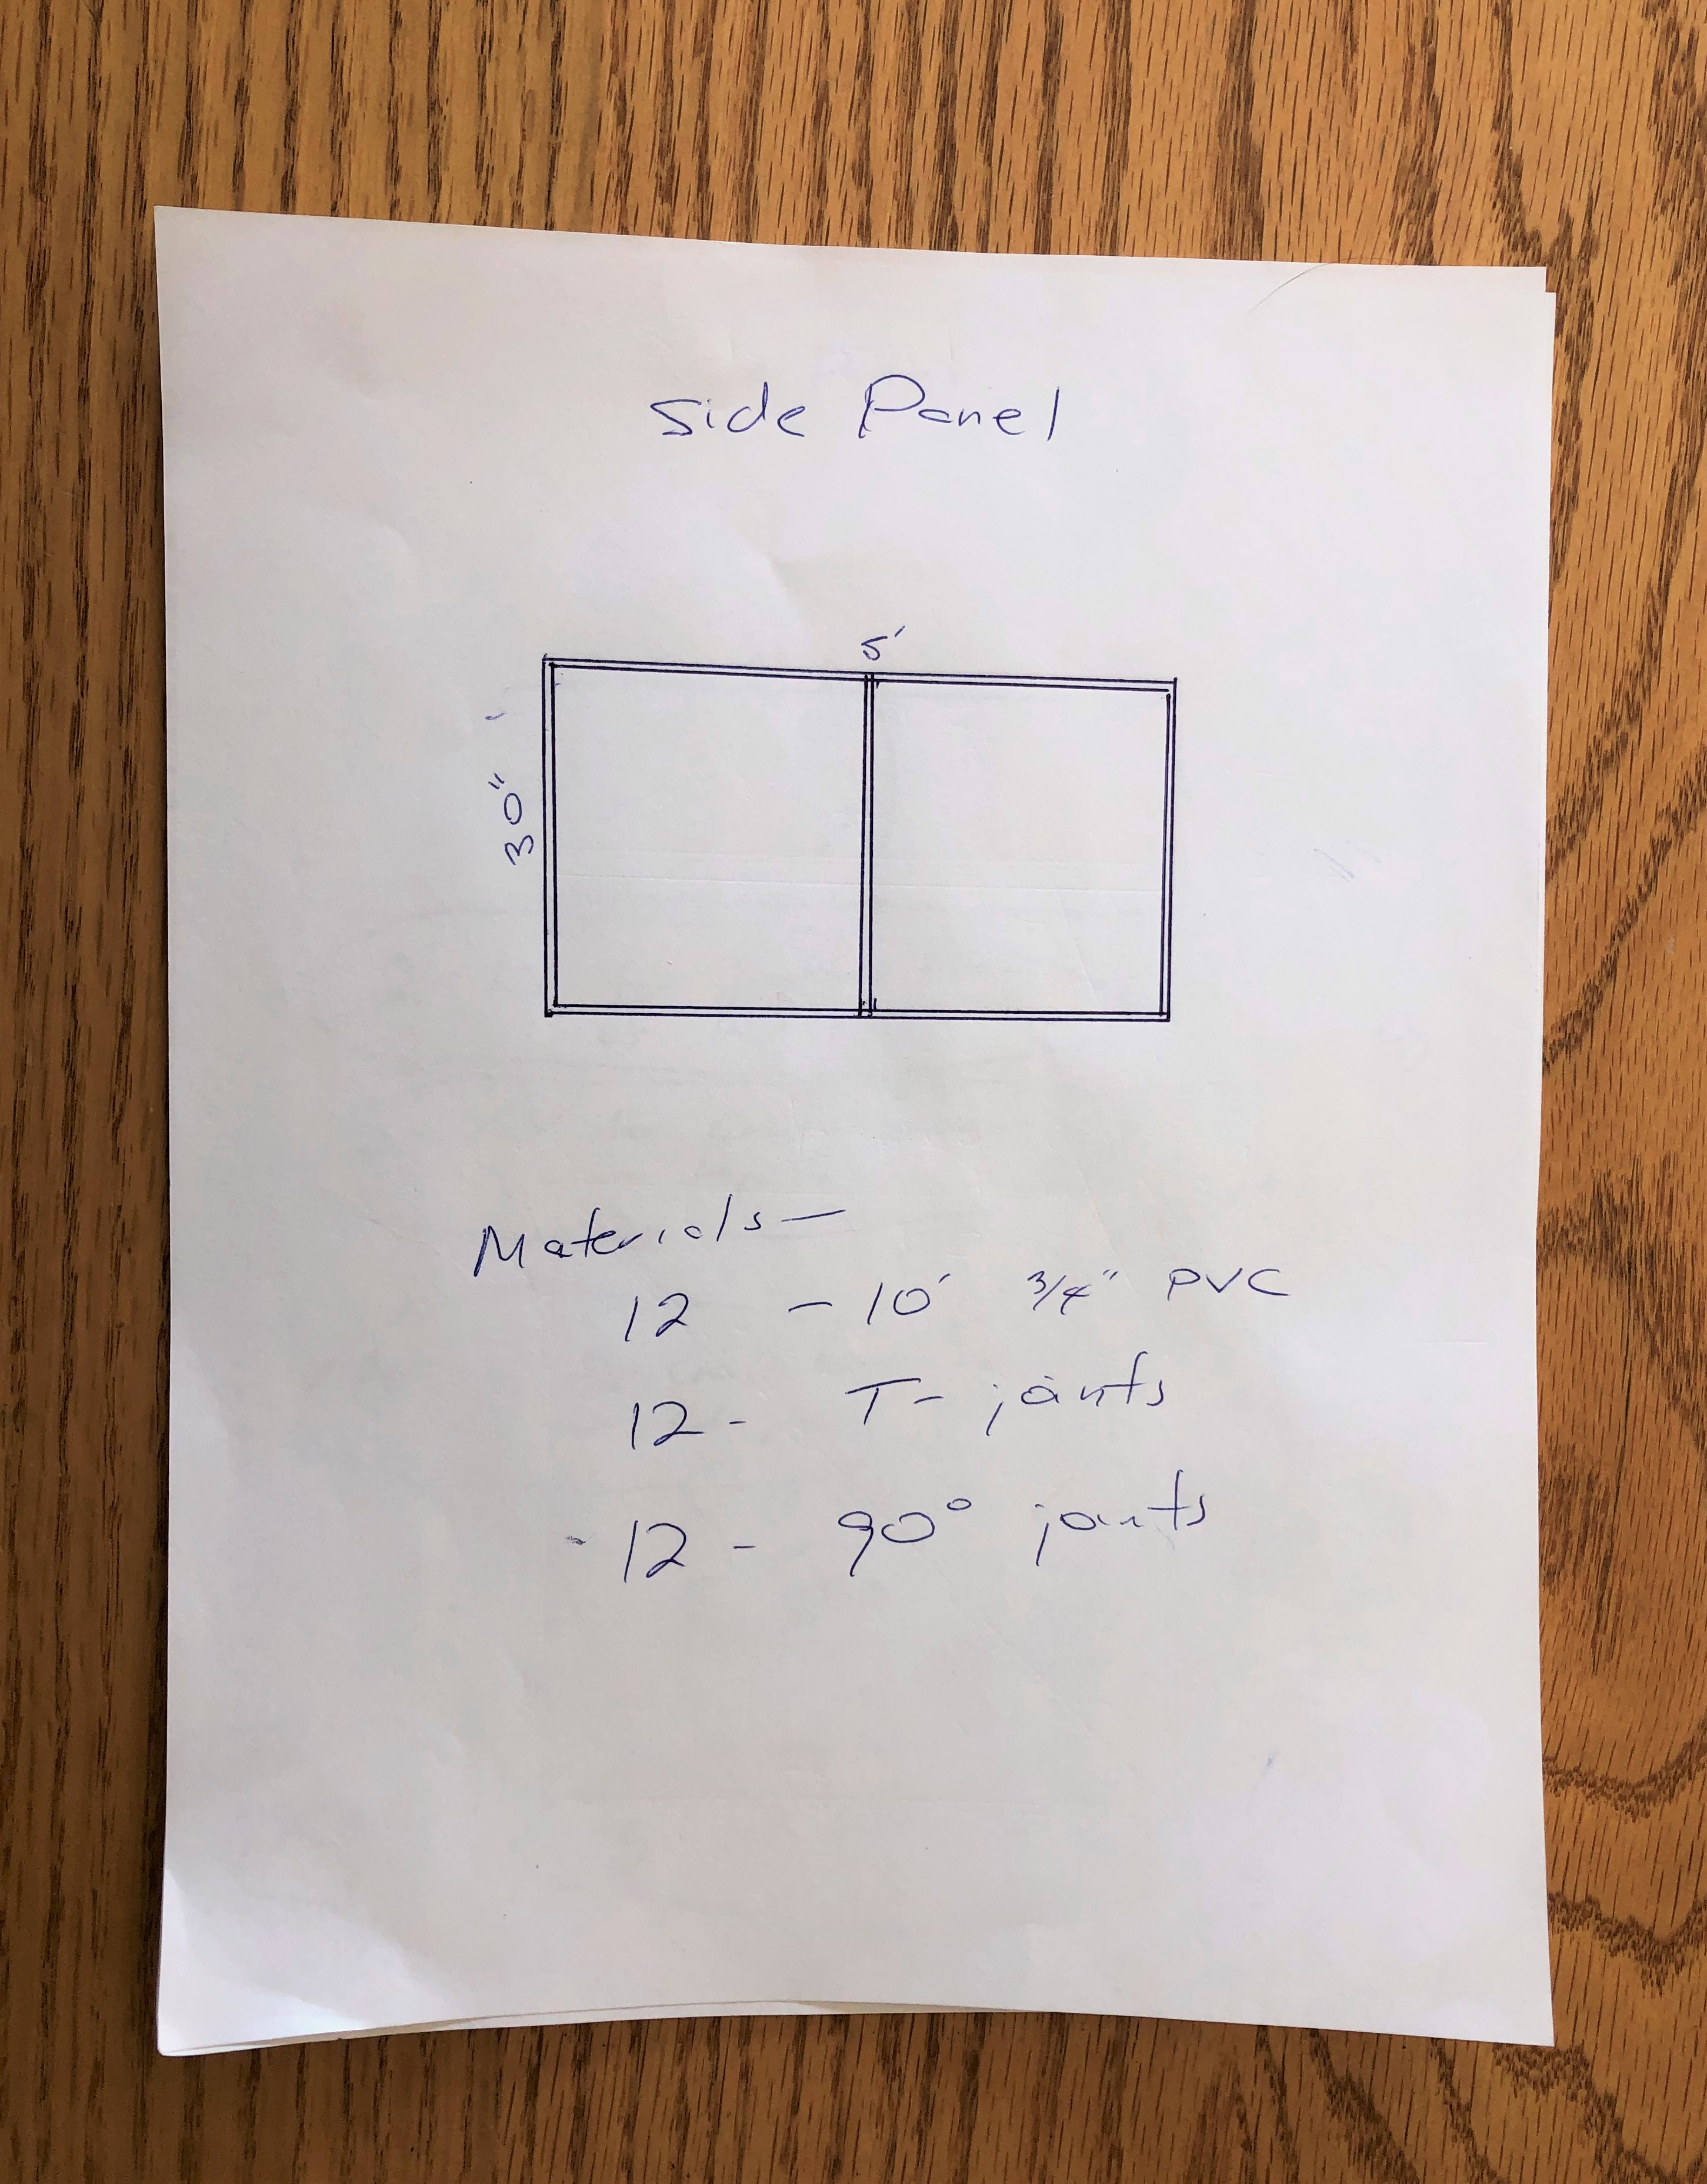
And this is how the drawing of the ground blind’s side panels appears:
.
.
.
.
.
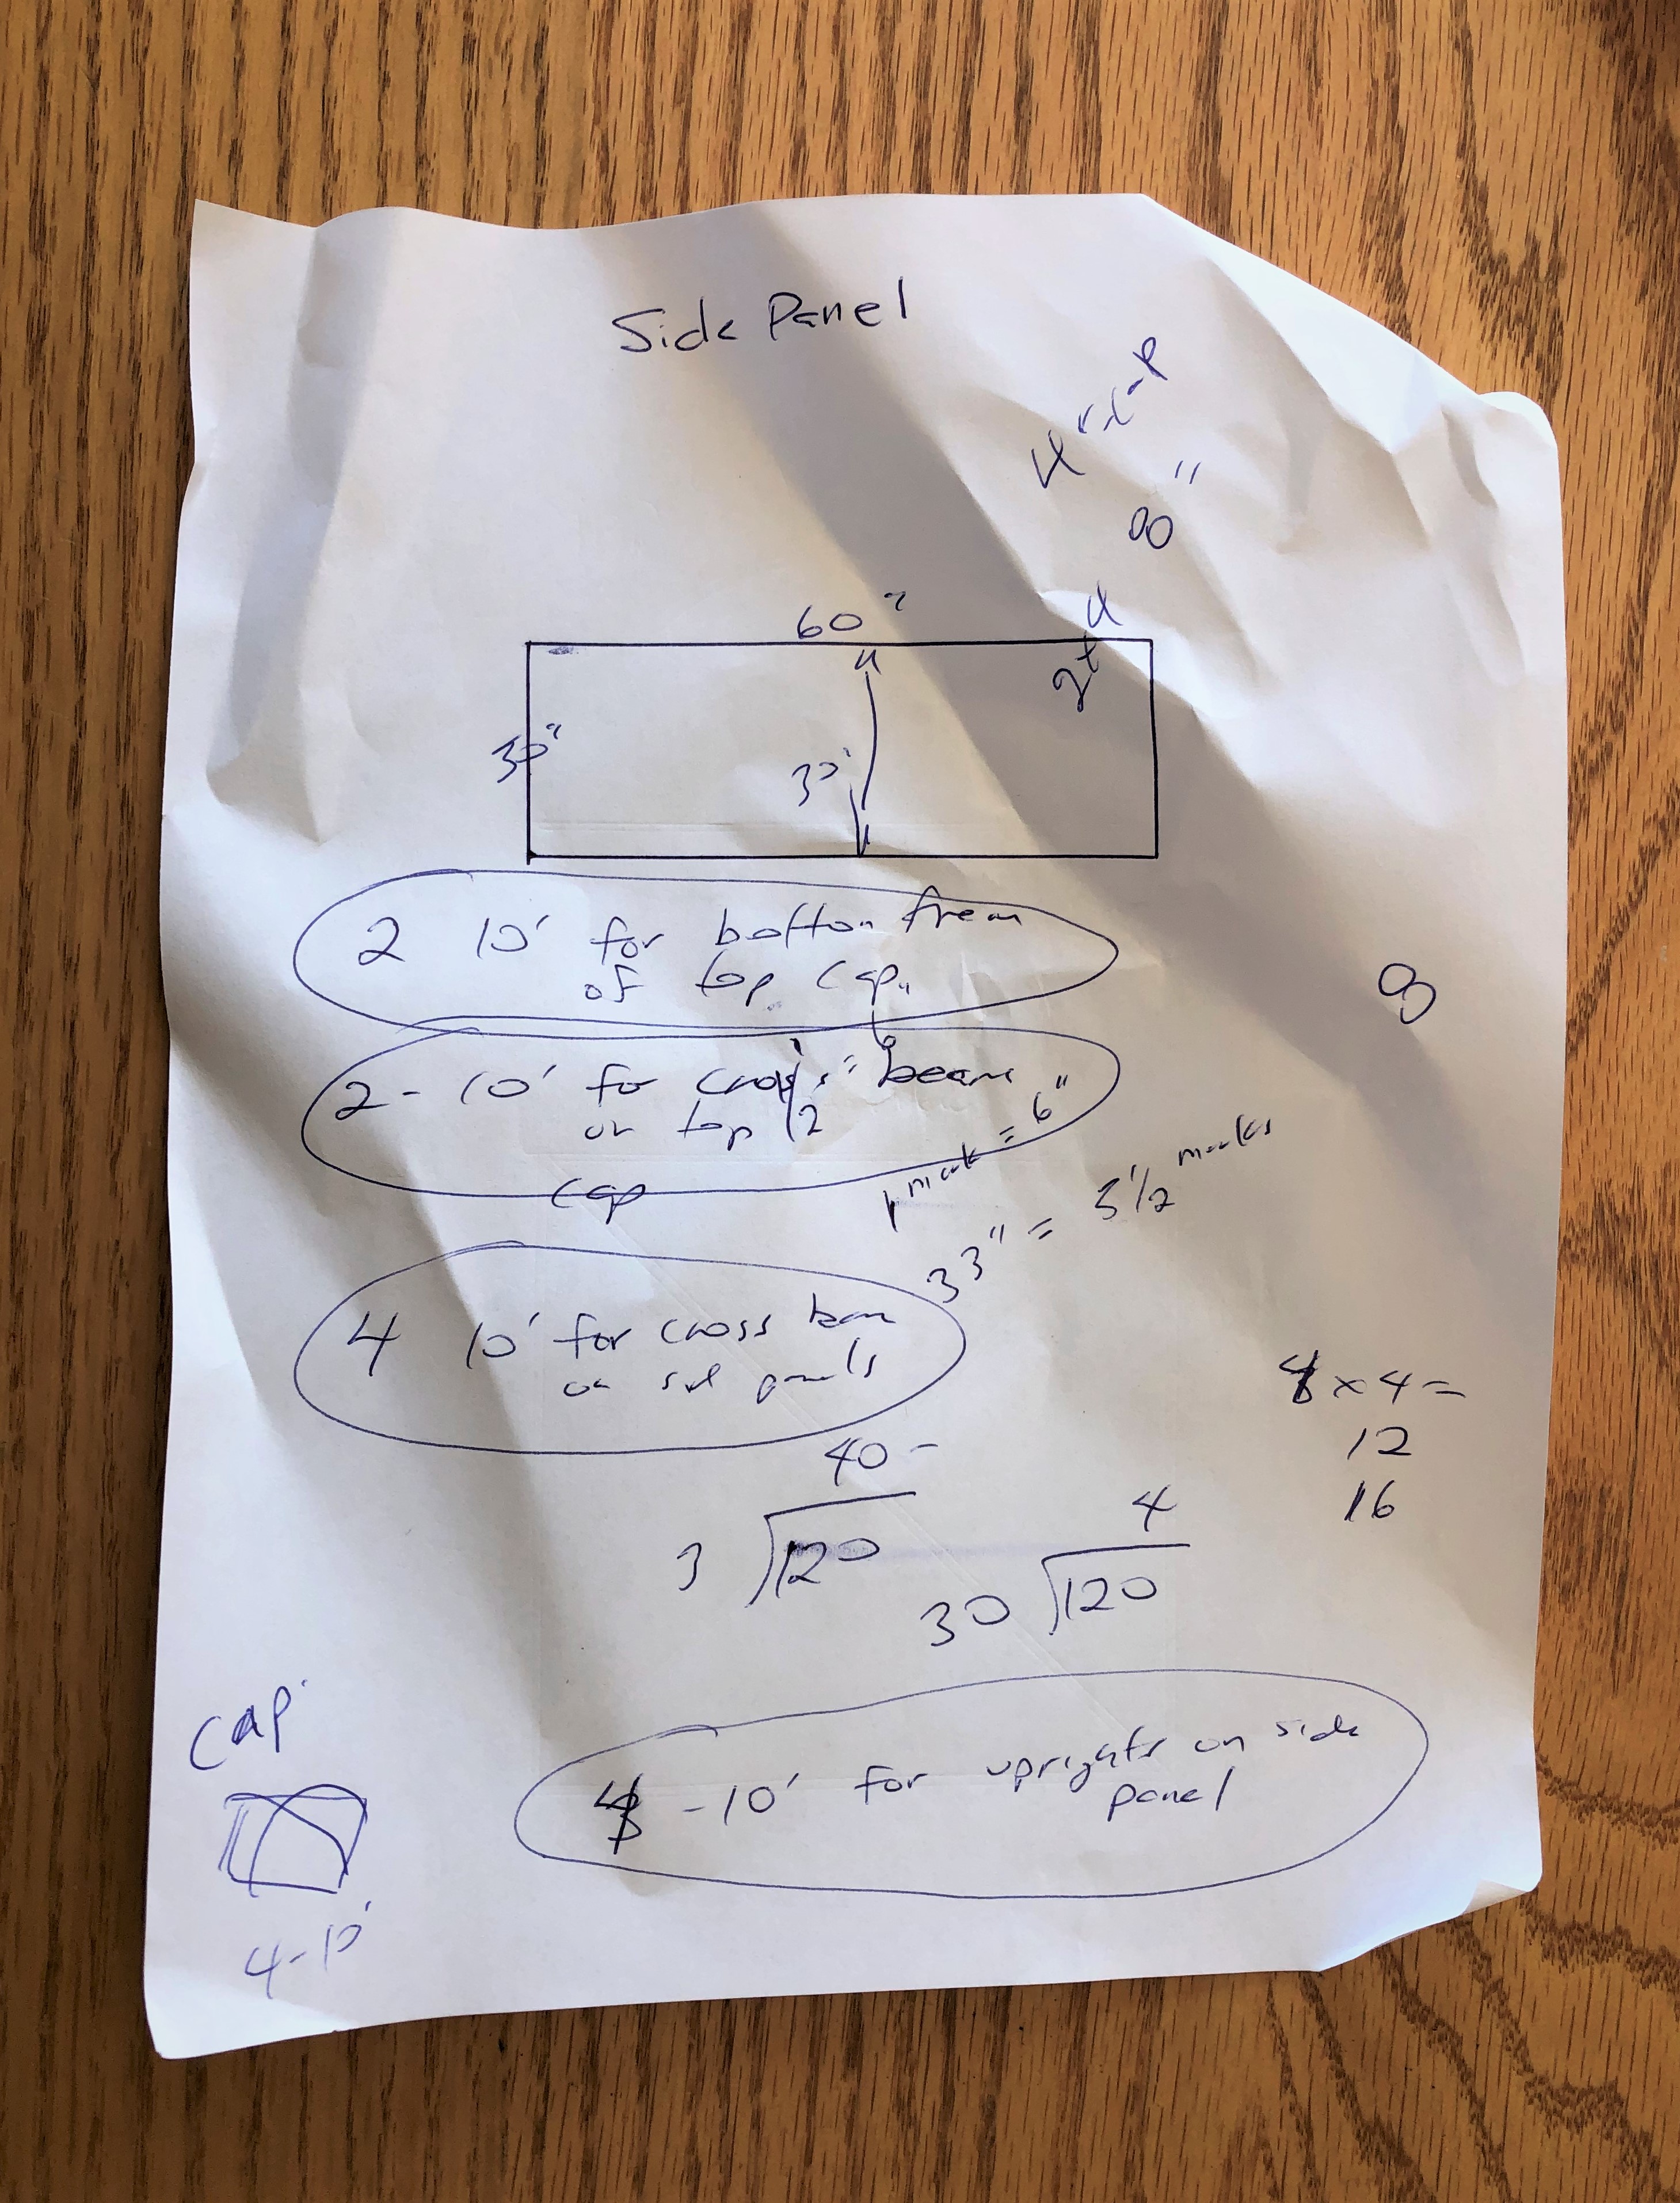
But this is how my preliminary drawing of the entire project appears, and to be honest this is the only drawing I used for reference.
.
Time to get to work.
Step 2 – Compile a list of the materials required for the project
Make a comprehensive list of all the supplies required for this project:
12 10-foot lengths of ½-inch PVC pipe
12 ½-inch PVC ½-inch T coupling pieces
20 ½-inch PVC 90-degree coupling pieces
1 can PVC cement
1 roll of 14-gauge galvanized steel electric fencing wire
2 6×8 foot polyester tarps
2 10×12 foot polyester tarp
1 roll of duct tape
1 2 ½-inch bolt with nut
Step 3 – Prepare the pieces to assemble the cap section of the ground blind
Cut from the 10-foot sections of PVC pipe: 2 59-inch lengths of pipe, and 2 57-inch lengths of pipe. You will need the shorter sections of pipe for the “east” and “west” sides of the frame’s base because the T-couplings that are needed to attach the over-arching sections of PVC pipe will add two inches of overall length to the “east” and “west” sides of the base. Save these cut off scrap pieces; of PVC; you will need them in Step 4.
Step 4 – Make the arch juncture assemblies from PVC couplings
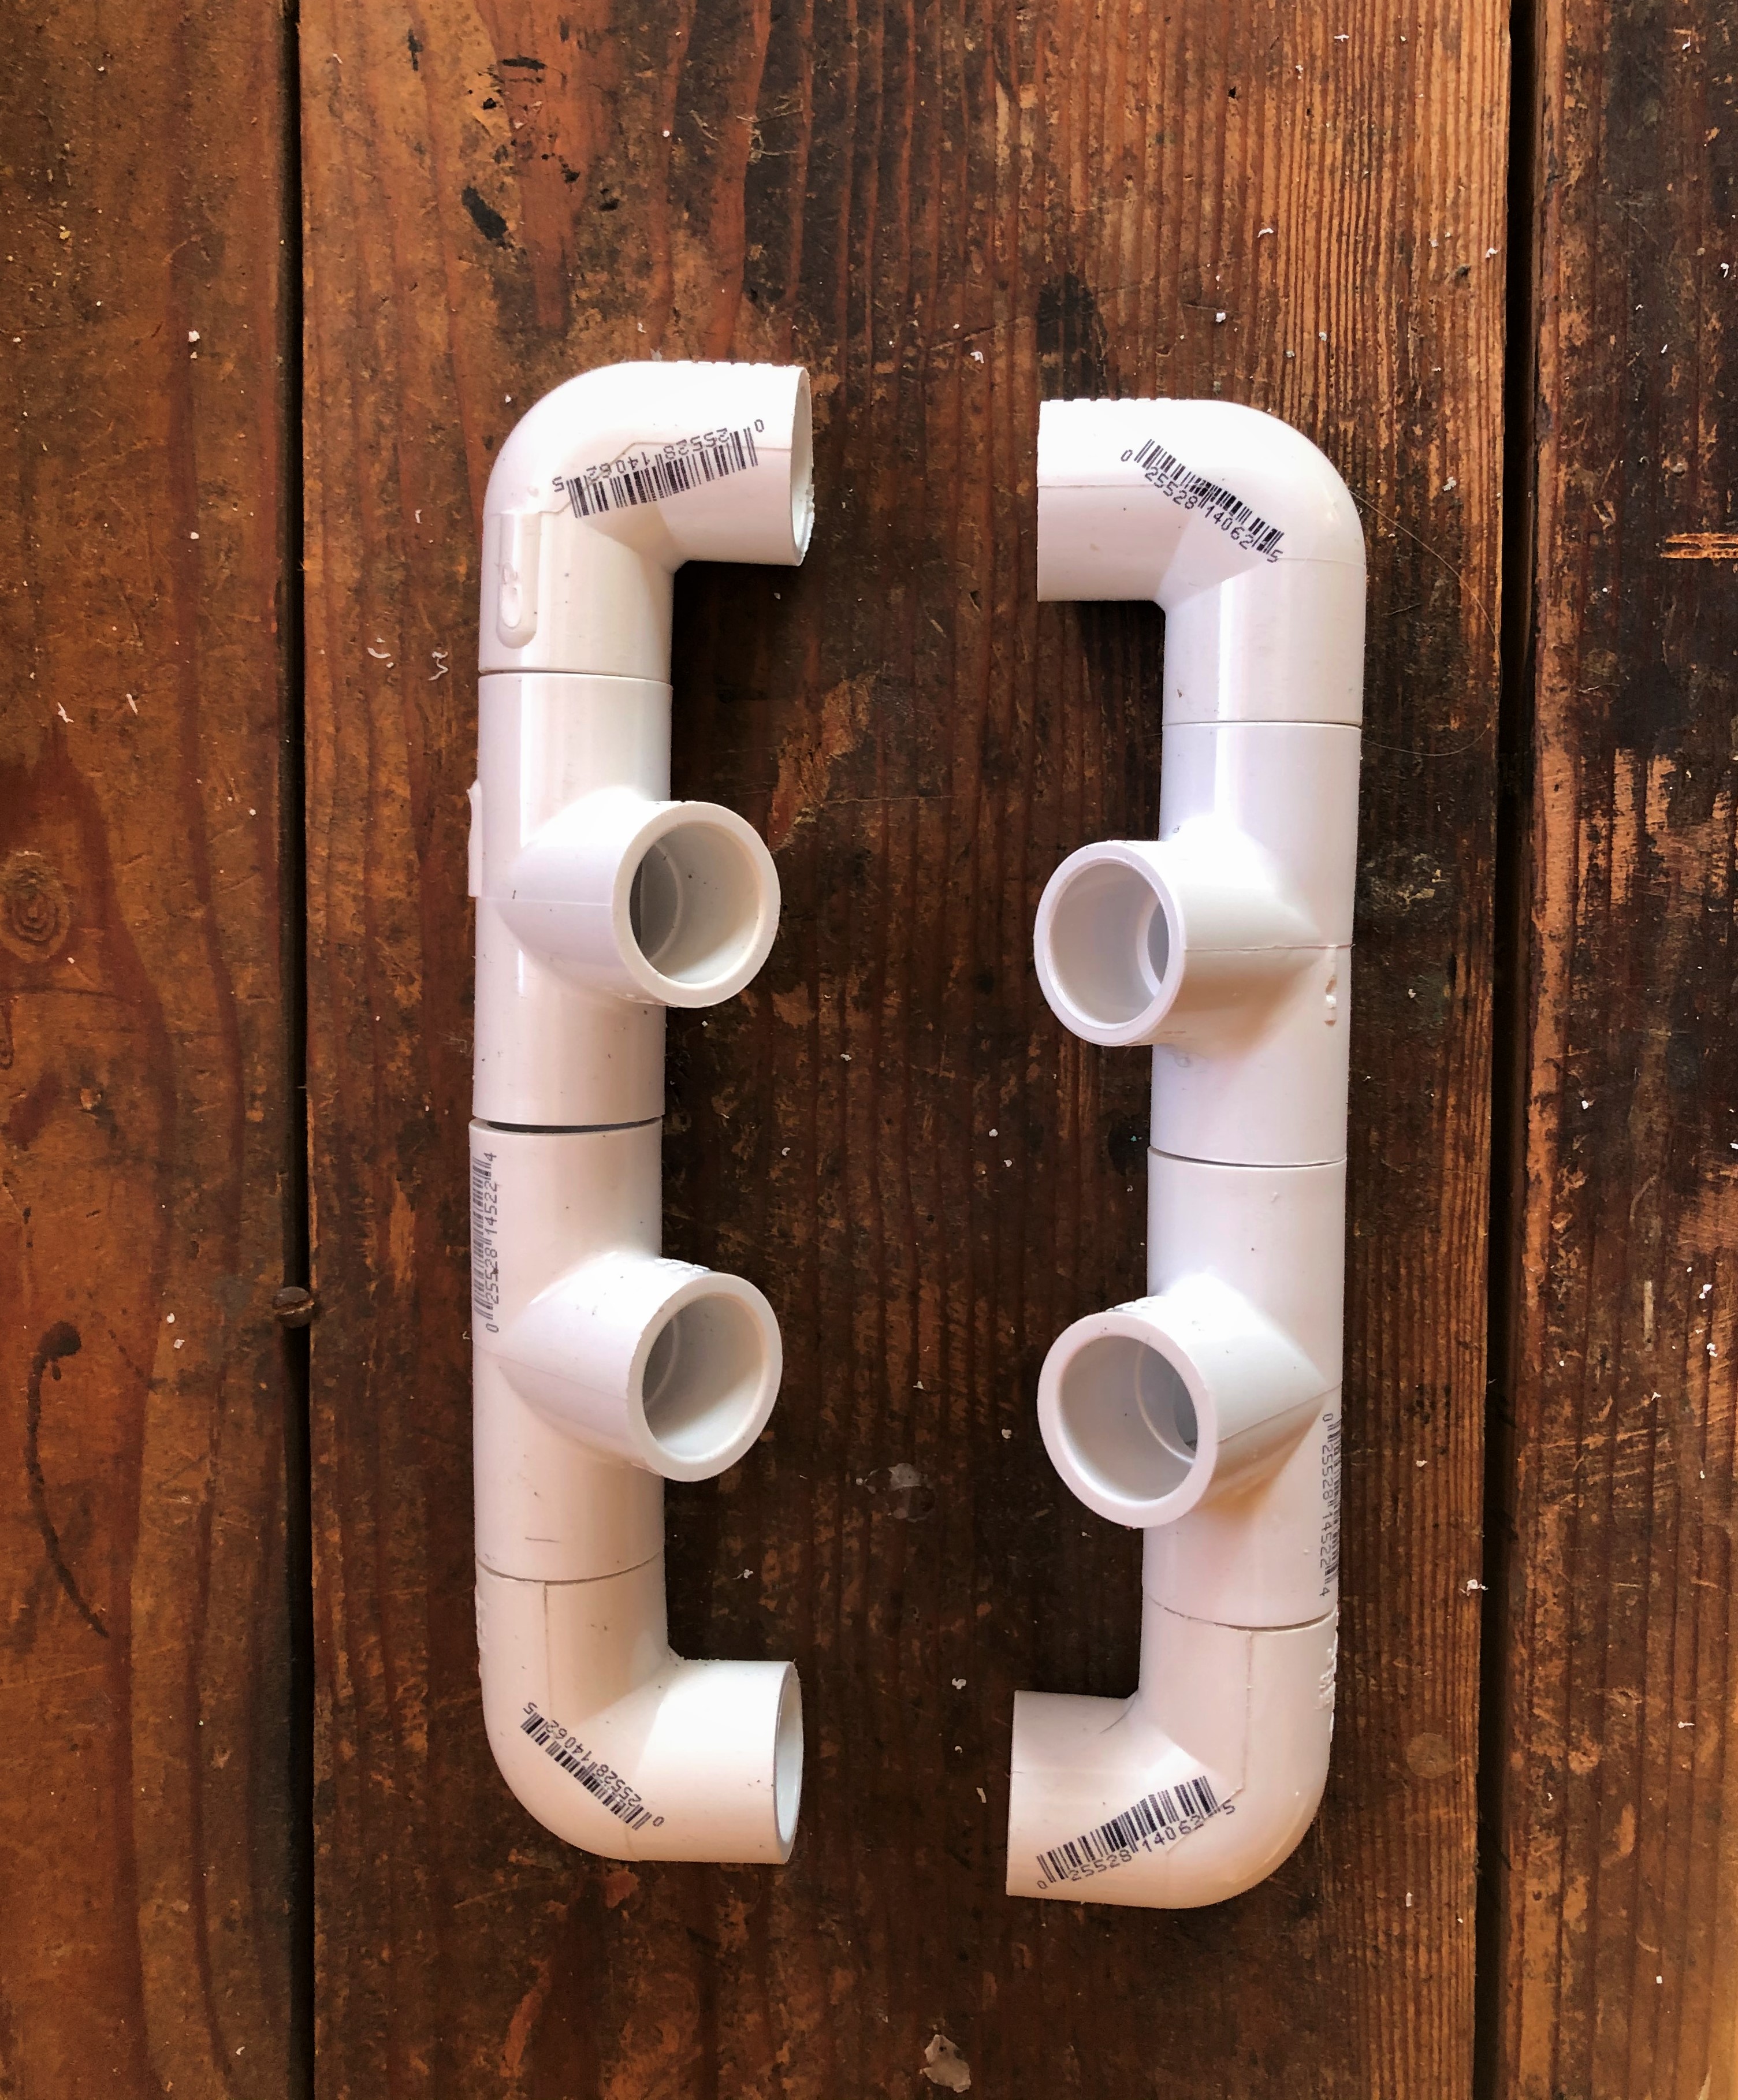
The four corners of the top cap’s base require a junction assembly to attach the over-arching lengths of PVC pipe. Use the cut off scrap pieces of PVC from Step 3 to cut four 1 ½- inch lengths of pipe. Insert one end of the 1 ½- inch length of pipe into a 90-degree PVC corner coupling, and insert the other end into a T-coupling.
The T-coupling must tilt upward at a 60-degree angle compared to the corner coupling; place the juncture assembly flat on the work bench to measure this angle. Tip: do no cement the three pieces of the juncture assembly until you are sure the T-coupling is at a 60-degree angle with the corner coupling and that it slopes in the correct direction (see photo).
Step 5 – Connect the arch junction assemblies to the 57-inch lengths of PVC pipe
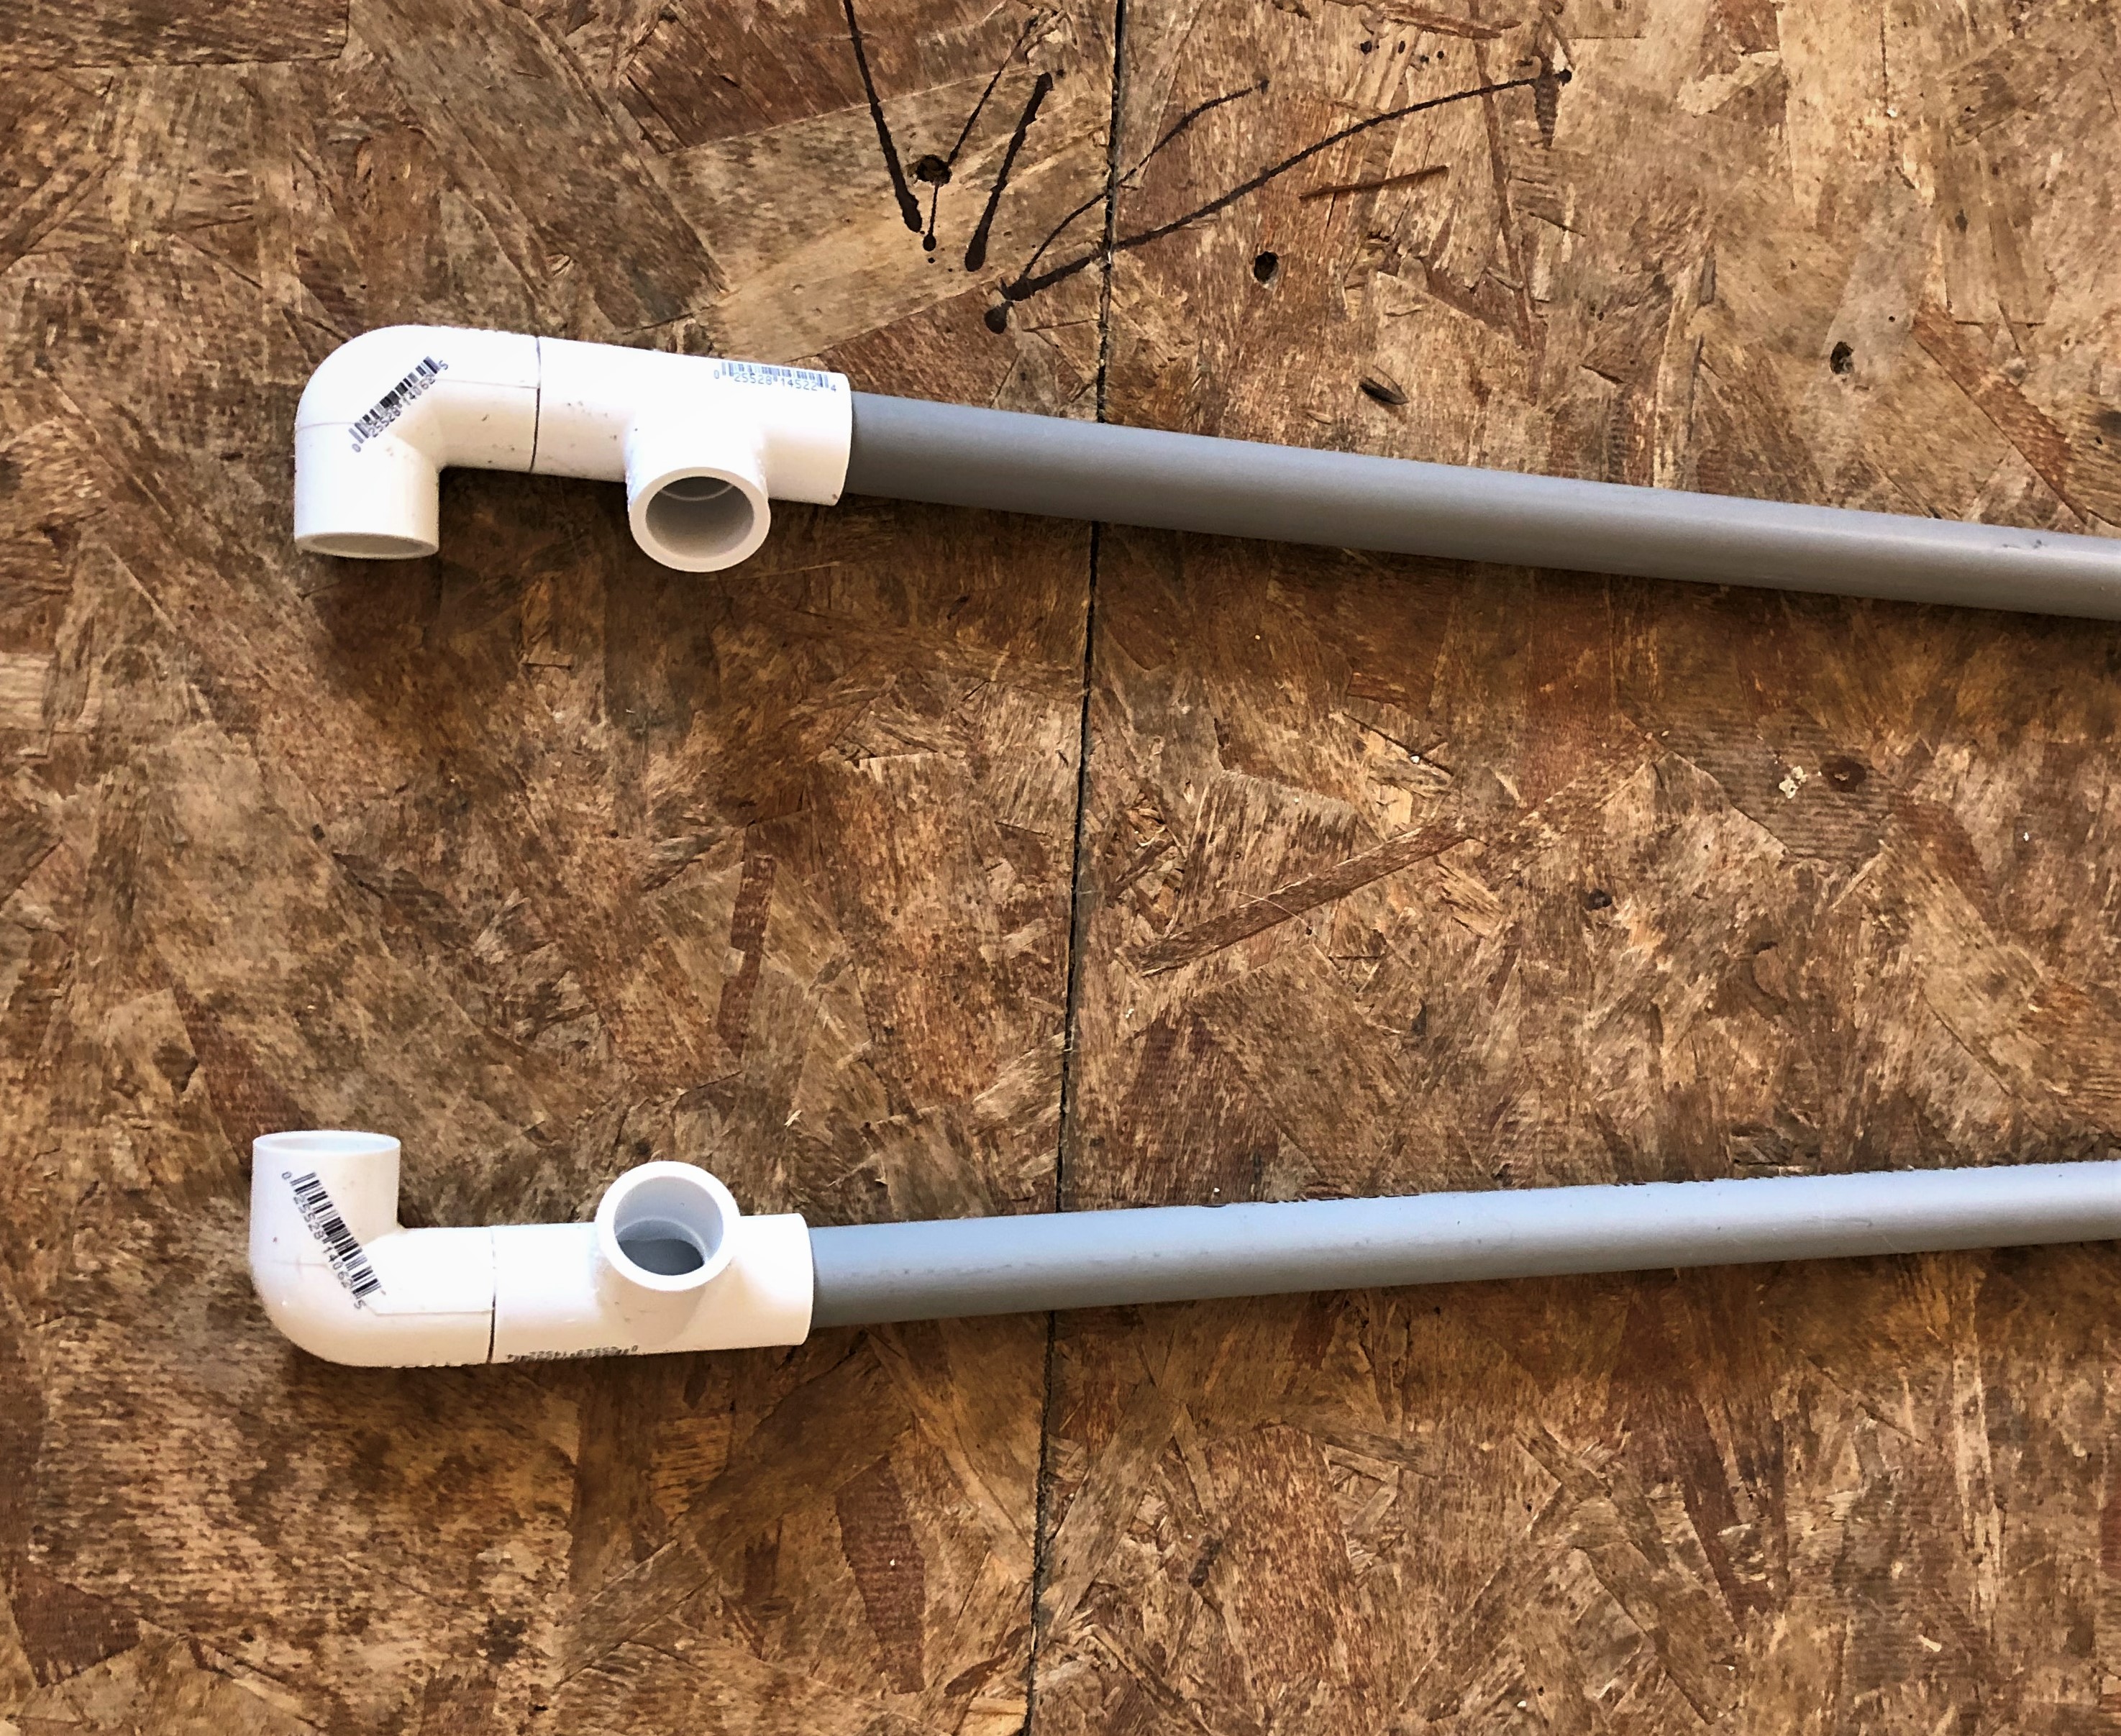
Insert and cement the 57-inch lengths of PVC pipe into the T-coupling of the arch junction assemblies, one assembly at each end of the pipe. Be sure to maintain the T-couplings’ 60-degree inward slope. These 57-inch pipes with the assemblies attached will be the “east” and “west” sections of the ground blind cap’s base. Tip: use a rubber mallet to tap all PVC connections securely together.
.
Step 6 – Attach the 59-inch lengths of PVC pipe to the corner couplings
Insert and cement the two 59-inch lengths of PVC pipe into the corner couplings of the “east” and “west” base pieces. These lengths of pipe are now the “north” and “south” sides of the cap frame’s base, which should be a square of about 60 inches on each side.
Step 7 – Attach the over-arching 10-foot lengths of PVC pipe to the corner junctions

Insert and cement one end of one 10-foot length of PVC pipe into the “northeast” corner junction; bend the pipe and insert and cement the opposite end into the “southwest” corner junction. Insert and cement one end of another 10-foot PVC pipe into the “northwest” corner junction, and the opposite end into the “southeast” corner junction. The two 10-foot lengths of pipe should now cross to form a dome. Tip: heat the full length of the PVC pipe with a hair dryer or infrared lamp or other means so that the pipe can be more easily bent into a uniform curved arch.
Step 8 – Join the over-arching PVC pipes at the midpoint of the arch
Mark the midpoint (at 60 inches) of each of the over-arching PVC pipes. Drill a vertical hole through the midpoint mark of each pipe and insert a 2 ½- inch bolt through the holes to align and connect the over-arching pipes.
Step 9 – Brace the arches with wire
From the midpoint bolt at the top-center of the arch, measure and mark each of the PVC arch pipes at 12-inch intervals: 12, 24, and 36 inches. Drill a small horizontal hole through the pipe at each of the marked intervals. Pass a continuous strand of wire through the top set of holes, putting just enough tension on the wire to keep it taunt and looping it around each PVC pipe to hold it secure. Do the same for the set of holes drilled at the 24-inch marks. Do the same for the set of holes drilled at the 36-inch marks. Tip: do not stretch the wire too tightly or you will pull the dome out of alignment or cause the PVC pipe to bow.
Step 10 – Cut lengths of PVC pipe to construct the side panels
To construct the side panels, cut the 10-foot lengths of ½-inch PVC pipe into 28 pieces that are each 29 inches in length.
Step 11 – Attach PVC couplings to pipe sections
Attach and cement a 90-degree corner coupling to one end of 16 of the 29-inch lengths of PVC pipe. Attach and cement a T-coupling to the other end of eight of these pieces. Be sure that all of the corner couplings and T couplings point in the same direction. Twelve of the 29-inch lengths of PVC pipe should have NO couplings attached.
Step 12 – Attach two pieces to form the top frame bar of a side panel
Inset and cement one of the pieces with a corner coupling ONLY into the T-coupling of a piece that has both a T-coupling and a corner coupling. The T-coupling is now the mid-point of the side panel top bar. Repeat for all four top bars for side panels.
Step 13 – Attach two pieces to form the bottom frame bar of a side panel
Inset and cement one of the pieces with a corner coupling ONLY into the T-coupling of a piece that has both a T-coupling and a corner coupling. The T-coupling is now the mid-point of the side panel bottom bar. Repeat for all four bottom bars for side panels.
Step 14 – Attach PVC pipes as uprights to the top and bottom bars of the side panels
Connect a side panel top bar to a side panel bottom bar by inserting and cementing three of the 29-inch lengths of PVC pipe into the corner couplings at each end and the T-coupling at mid-point. Tip: Lay the side panel pieces flat on the workshop floor so there is no buckling or twisting. Repeat for the other three side panels.
Step 15 – Cover the side panels with tarps
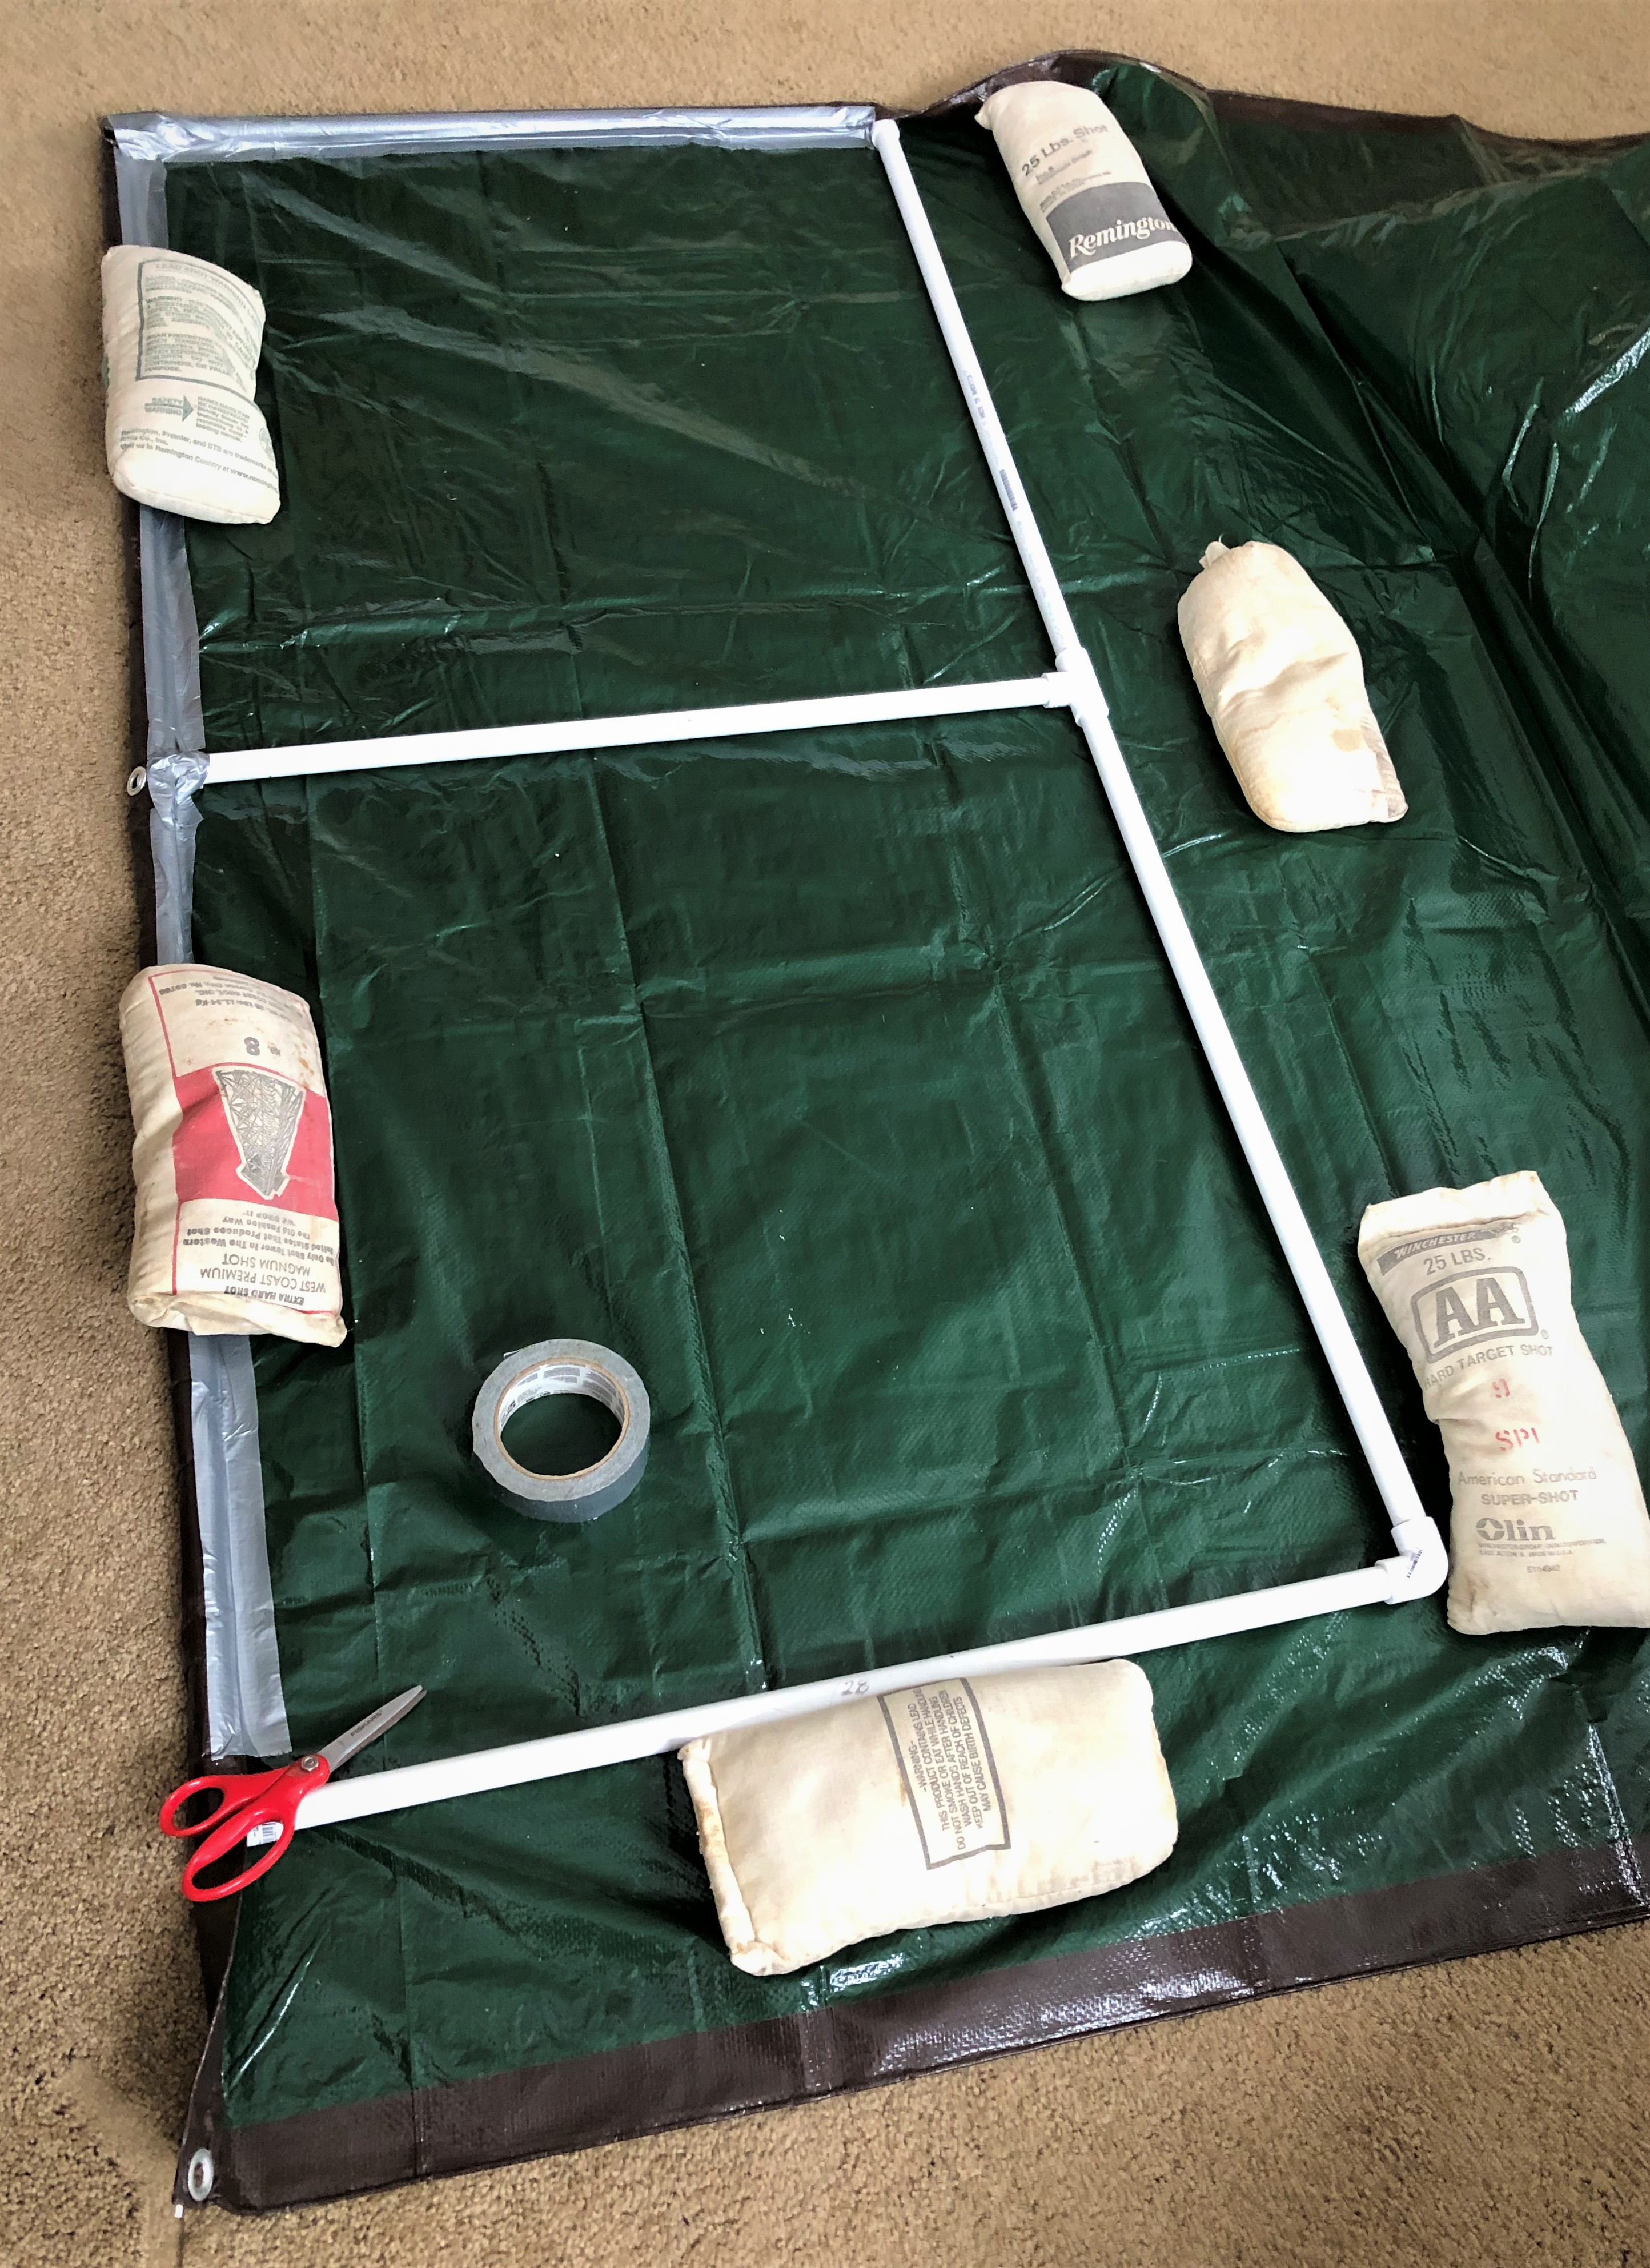
Lay a side panel flat on the workshop floor atop a 6×8 polyester tarp. Fold the hem of the tarp over the top bar of the panel and tape it to the full length of the bar with duct tape. Pull the tarp fabric taunt underneath the side panel frame and cut it along the length of the panel’s bottom bar with a scissors, leaving a 2-inch hem. Fold the tarp’s newly cut hem over the bottom bar and tape it the full length of the bar. Do the same with the end bars of the panel. Repeat with two other panels.
The last panel should be covered with tarp material only to the center upright bar so that there is an entry portal into the ground blind.
.
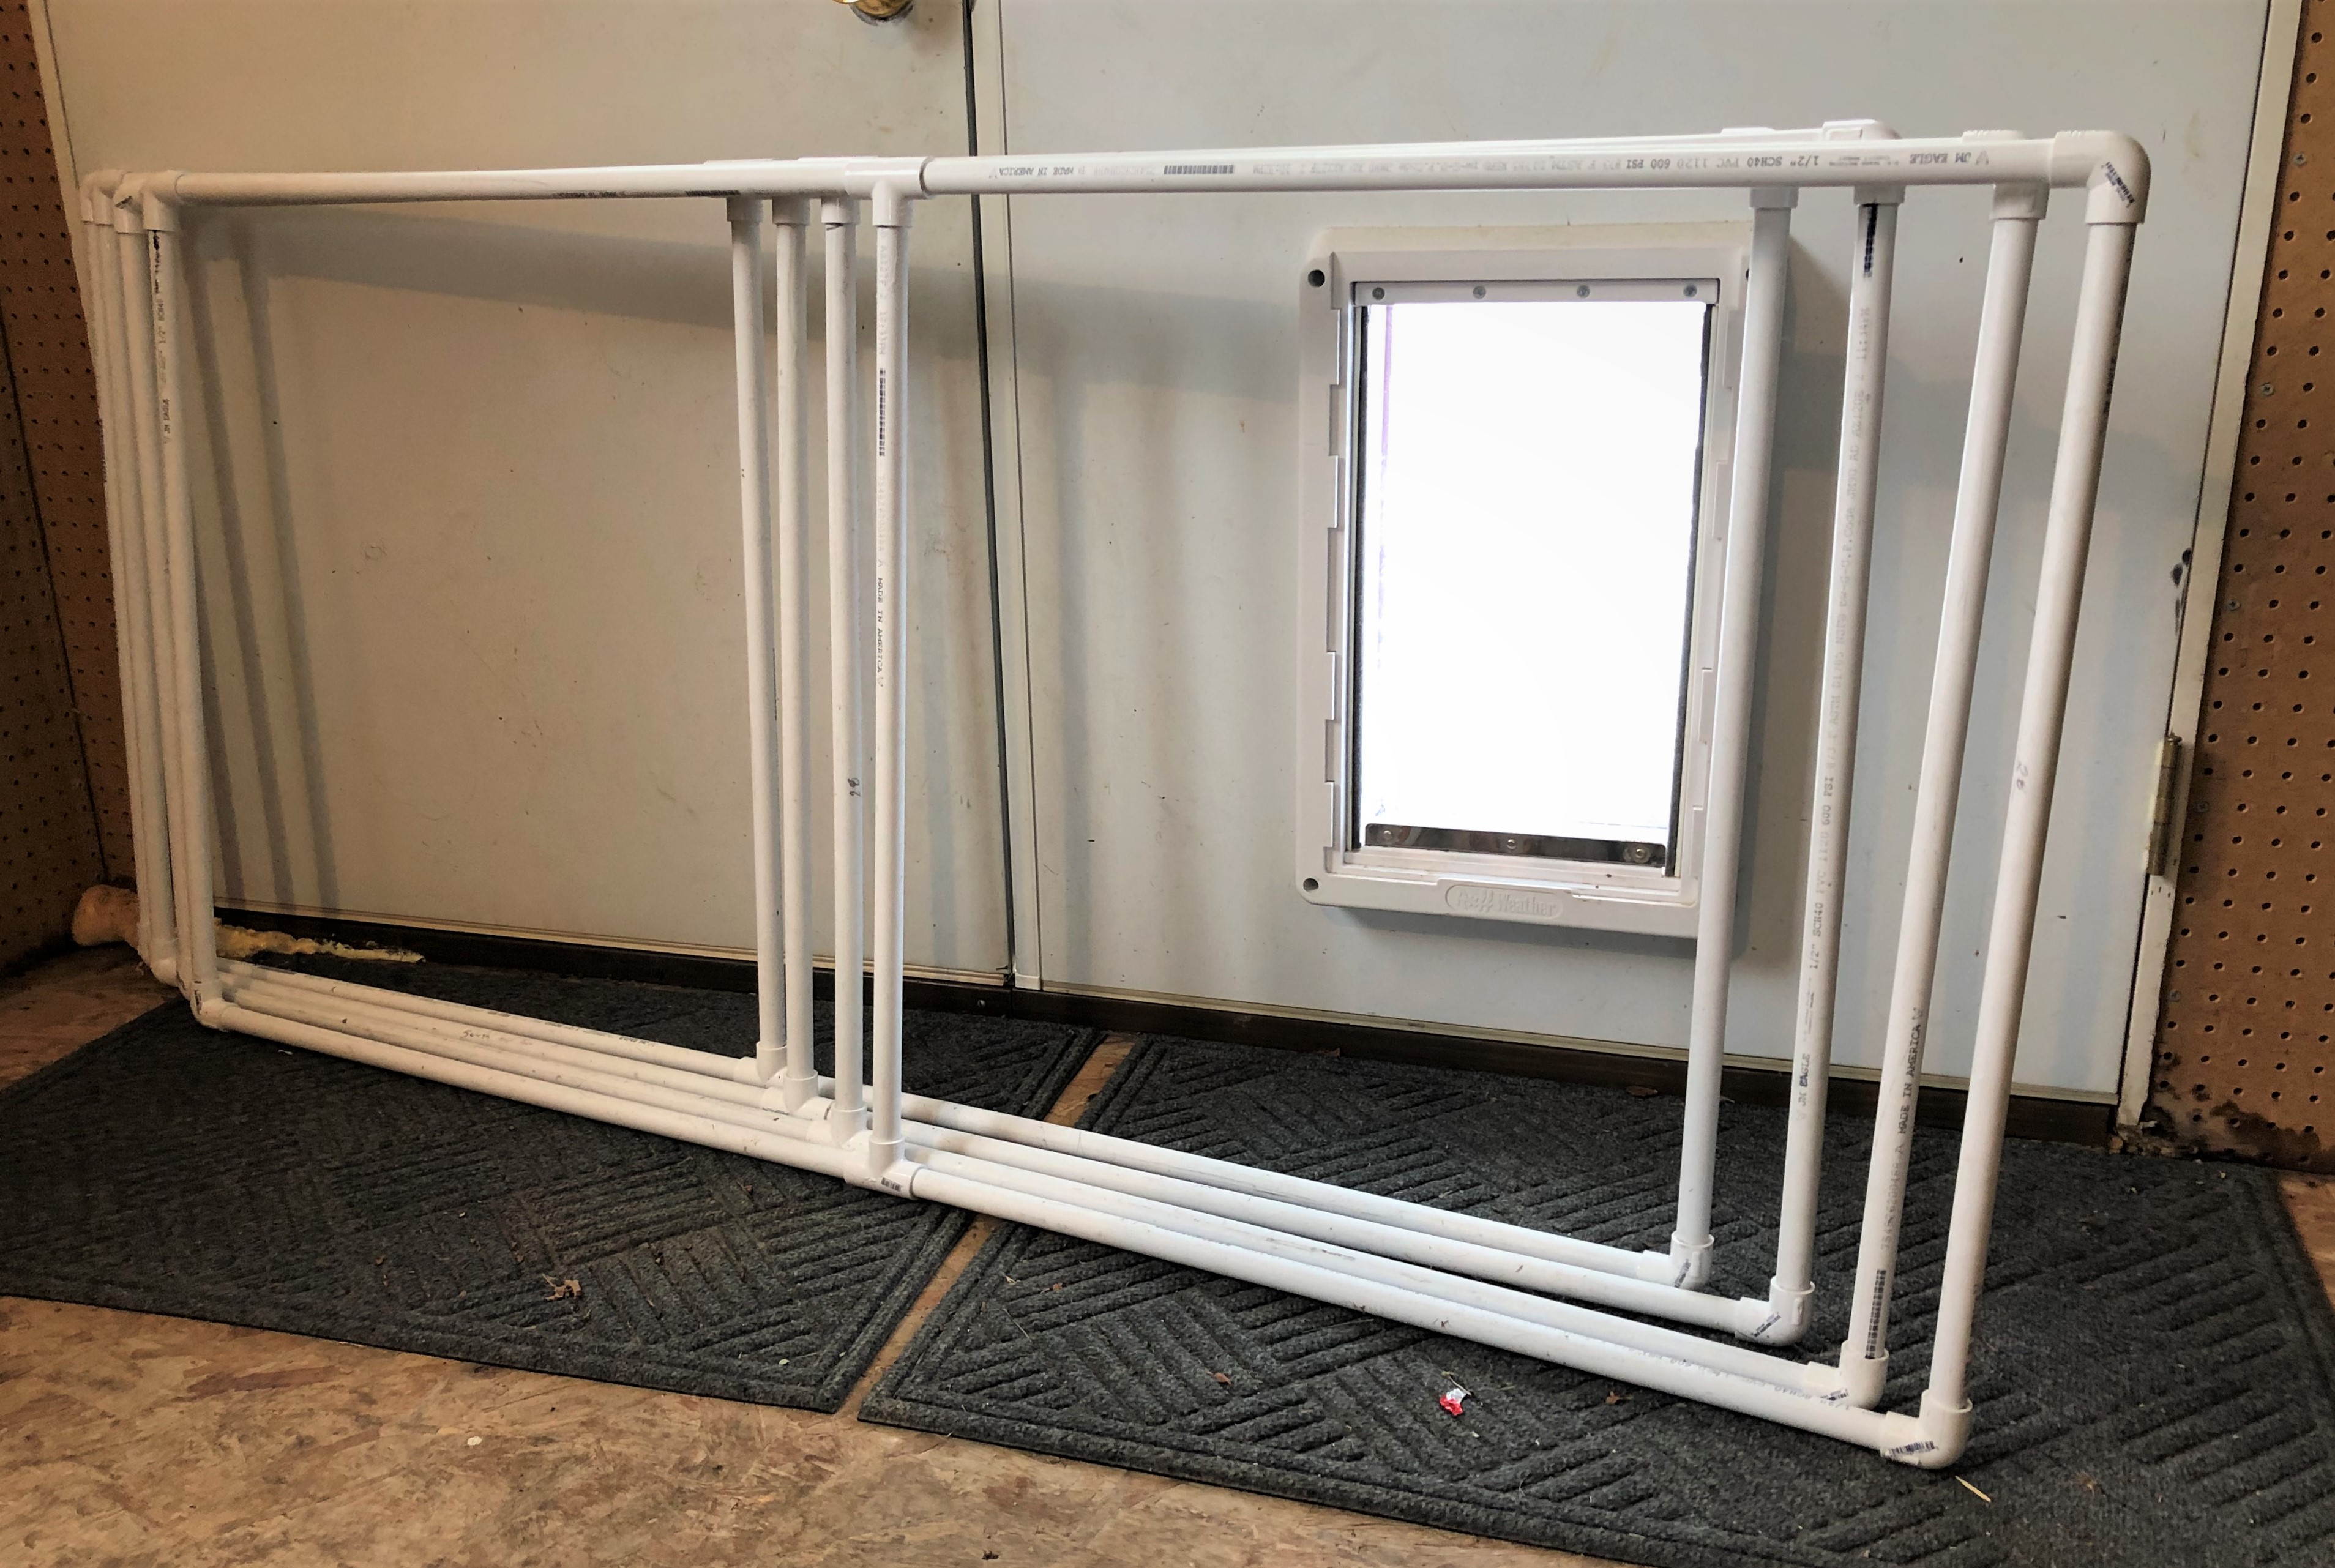
Step 16 – Cover the ground blind’s top cap with a 6×10 tarp
Tip: set the ground blind cap up on saw horses or the edge of a work table so that you can work from both inside and outside the cap.
From the “north” side of the ground blind’s cap frame, drape a tarp that measures 6×10 feet across the top of the dome and then center it (you may have to cut this 6×10 piece to size from a larger tarp). The tarp will not fit snuggly over the curved dome of the frame. Fold and tape tucks in the tarp material (as described below) on all four faces of the ground blind cap to make the fabric conform as closely as possible to the shape of the PVC frame.
Take two small tucks in the excess material to stretch it taunt on the “north” face, then tape the “north” hem of the tarp to the “north” bottom bar of the frame. Take two small tucks in the excess material to stretch it taunt on it “south” face, then tape the “south” hem of the tarp to the “south” bottom bar of the frame.
Take two larger tucks in the material on the “west” face of the cap to stretch it taunt; fold the tucks tightly and tape the full length of the tuck folds on the outside. Go inside the cap and tape the full length of the tuck folds on the inside. Repeat this tuck-and-tape procedure for the “east” face.
Return to the tuck folds on the “north” and “south” faces. Draw the fabric tight with these tucks and then tape the tuck folds full length on the outside. Go inside the cap and tape these “north” and “south” tuck folds full length.
From inside the cap, tape the tarp to the lowest brace wire strut of the frame. Tape the lowest strut wire against all four faces: north, west south, and east.
Two faces of the ground blind cap will now have arched window apertures above the base of the cap.
.
.
.
.
Step 17 – Set up the ground blind on-site
You are now ready to erect the ground blind on-site. Set the side panels upright on the long edge and wire the four of them firmly together to create a open-top box. Cross measure to make sure the box is square. Drive a tent peg into the ground at each corner and wire the frame to the pegs.
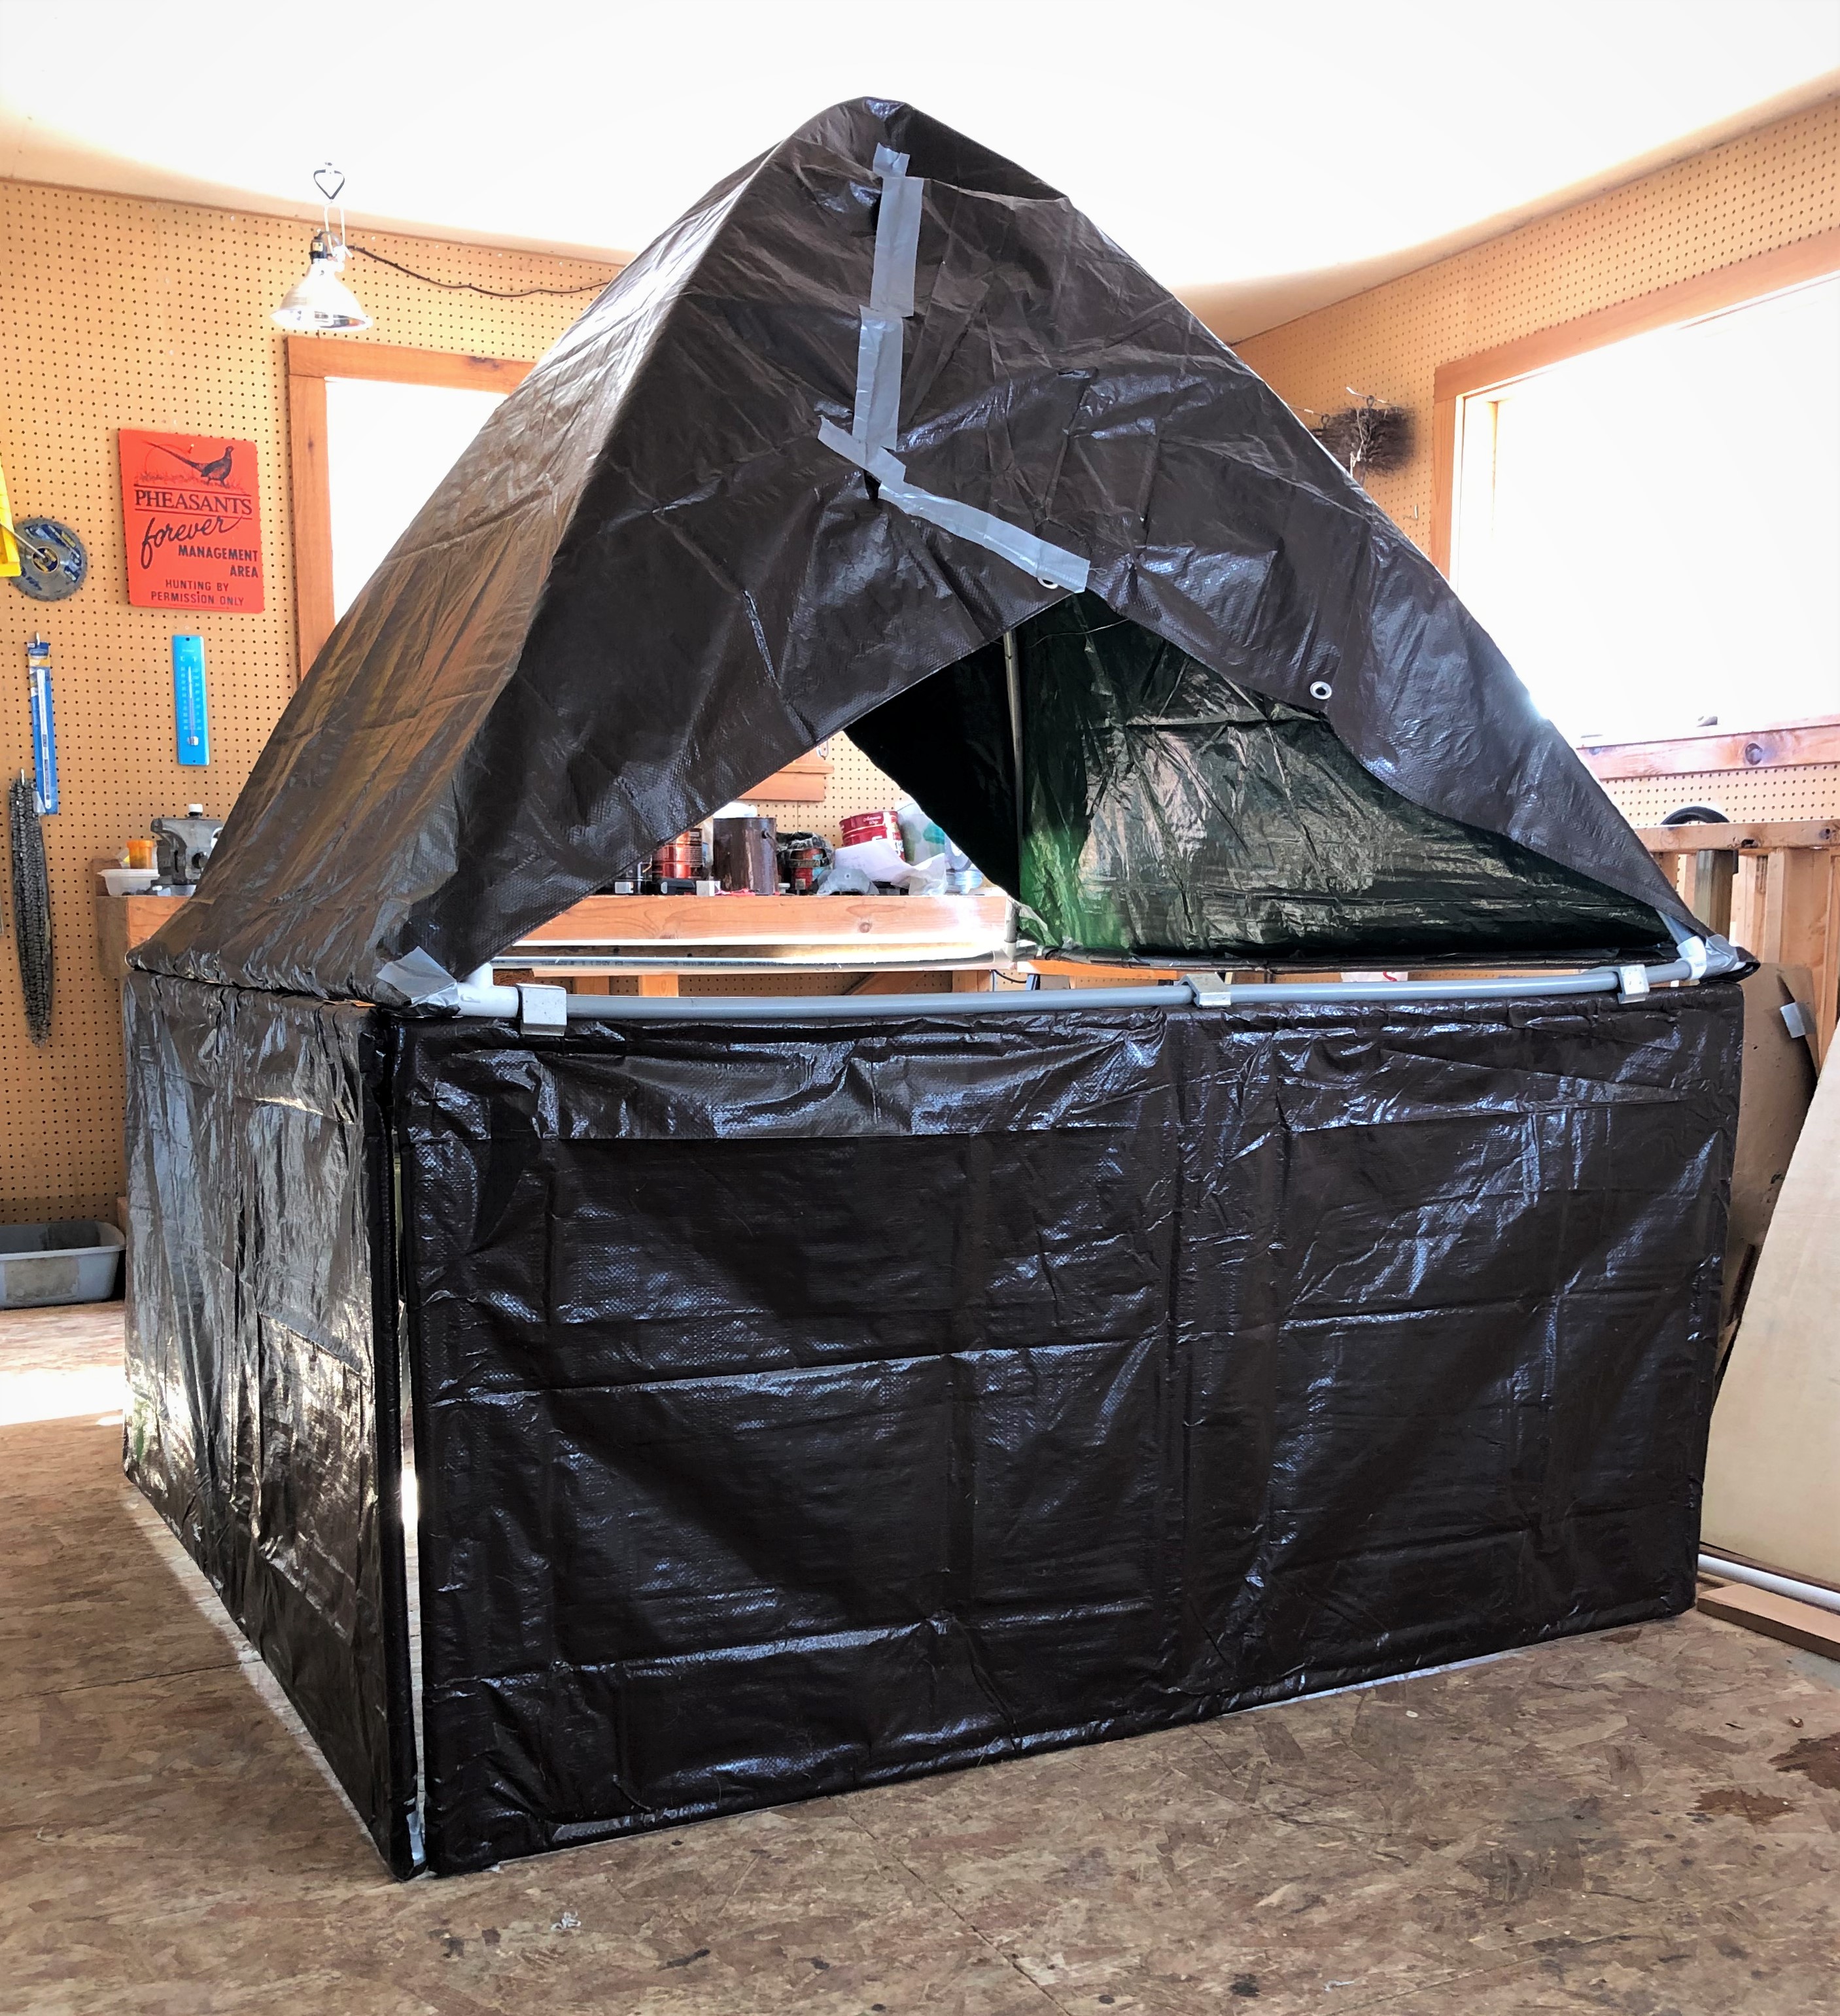
Set the cap on top of the box and securely wire it to the top bars of the side panel frames. To wire the cap and side panels together, secure the cap atop the side panels with C-clamps, then drill small vertical holes through the base frame pipe of the cap all the way through the top bar of the side panel. Drill these holes at 6 or 8-inch intervals through the superimposed pipes of the cap and side panels all the way around the blind. Insert a continuous wire down through the first set of holes, then up through the second set of holes, continuing until the cap is tightly wire-laced to the side panels. Pull the wire lacing very tight as you go. Use the same procedure to wire-lace the side panels together.
Step 18 – Acclimate and personalize the blind
Taking a folding camp stool, crawl into the ground blind through the entry portal. Set up the stool. Sit on it. Look out through the window apertures. Light a cigar. Smoke it. Drink a can of warm beer. You’ve earned it.
Note: The materials and supplies for this ground blind cost about $100, but I already had a roll of electric fence wire, a roll of duct tape, the top bolt, a can of PVC cement, one 6×8 tarp, and all the required tools. Plus the workshop.
_________________________________________________________________

Aw, this was an exceptionally nice post. Taking a few minutes and actual effort to make a superb articleÖ but what can I sayÖ I procrastinate a whole lot and don’t manage to get nearly anything done.